Are you eager to learn the secrets of successful alfalfa planting? Ready to transform your garden or farm with this nutrient-rich crop?
Discover the step-by-step guide you’ve been searching for in our blog post, How To Plant Alfalfa.
Dive into this comprehensive resource, and unlock the key to bountiful alfalfa yields that will elevate your agriculture game to new heights!
[ez-toc]
Chapter 1: Planting Basic Of Alfalfa
How long does it take for alfalfa to grow?
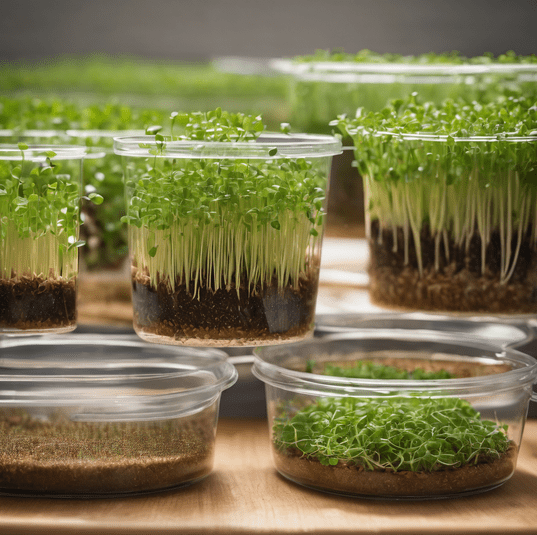
The progression of Alfalfa is intriguing to observe. Alfalfa seeds generally begin to sprout between 3 and 10 days, affected by elements like the warmth and wetness of the soil. After sprouting, alfalfa plants keep growing at varying speeds, and within a span of 40 to 60 days, they often get to a height ready for grazing or reaping. This specific growth speed might shift based on the conditions of the local weather and management approaches.
What Month Do You Plant Alfalfa?
Picking the right month to plant alfalfa is key to a successful start. Usually, the best time to plant alfalfa is in the spring, anywhere from March to early May in many places.
Why spring? Because this is when temperatures start to rise and days get longer. This allows the plants to strengthen their root systems and grow strong before summer comes with its intense heat.
How Much Alfalfa Seed is needed Per Acre?
Knowing the right seed amount per acre is key for good alfalfa growth. If you’re sowing only alfalfa, 15 to 20 pounds of seed for each acre works best. But, if you’re mixing alfalfa with other crops for feed, use about 8 to 15 pounds per acre. Remember, the precise quantity can change based on things like soil richness, your local weather, and your unique alfalfa aims.
How Do You Prepare A Field For Planting Alfalfa?
Field preparation plays a vital role in ensuring the successful establishment of alfalfa.
To prepare a field for planting alfalfa, follow these steps:
- Begin by clearing the area of any debris, rocks, and weeds.
- Conduct a comprehensive soil test to assess nutrient levels and pH, enabling you to make informed decisions about soil amendments.
- Plow or till the soil to create a smooth, fine seedbed. Alfalfa requires well-drained soil, so ensure that water can move through the soil easily.
- Consider incorporating any necessary soil amendments based on the soil test results.
- Properly level the field to avoid low spots where water can collect.
What Is The Best Way To Plant Alfalfa?
The best practices for planting alfalfa involve careful consideration of seeding methods.
Here’s how you can plant alfalfa effectively:
- Broadcast the alfalfa seeds evenly over the prepared seedbed.
- After seeding, use a cultipacker or roller to press the seeds firmly into the soil. Good seed-to-soil contact is crucial for successful germination.
- Adequately firming the soil helps retain soil moisture, encourages germination, and reduces the risk of seedlings being buried too deeply.
These detailed guidelines will help you achieve a thriving alfalfa crop. If you have further questions or need more specific information about any aspect of alfalfa cultivation, feel free to ask.
How Much Space Does Alfalfa Need?
Alfalfa’s spatial requirements are essential for its growth. Usually, the plants need to be separated by 6 to 12 inches within rows spaced around 18 to 24 inches apart. This arrangement ensures their optimal development by preventing resource and sunlight competition.
How Much Alfalfa Will 1 Acre Produce?
The yield of alfalfa per acre can vary widely depending on factors such as climate, soil quality, and management practices. On average, a well-maintained alfalfa field can produce around 3 to 5 tons of alfalfa hay per acre per year.
How Much Alfalfa Seed Will be Needed For 5 Acres?
When planting alfalfa on 5 acres, you would typically require about 75 to 100 pounds of alfalfa seed for pure stands. However, if you are mixing alfalfa with other forage crops, you may need to adjust the seeding rate accordingly.
Best Space For Alfalfa
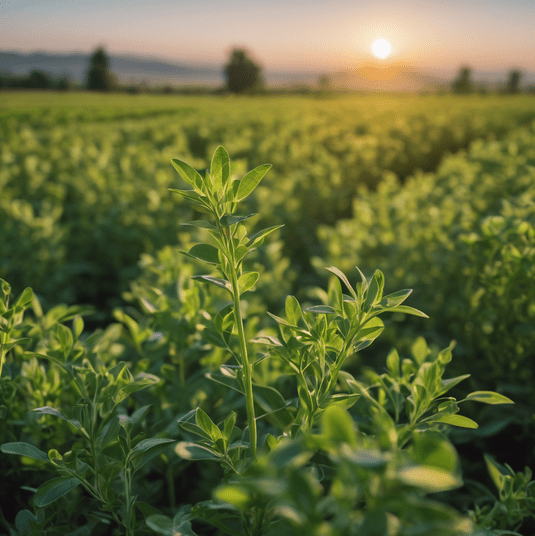
A prime location for cultivating alfalfa involves selecting well-drained soil, ensuring abundant sunlight, and maintaining a pH balance between 6.5 and 7.5. Adequate air circulation minimizes disease susceptibility. Furthermore, strategic plant and row spacing significantly contributes to robust growth and optimal productivity. Alfalfa’s thriving conditions epitomize the delicate balance of nature and agricultural expertise.
Chapter 2: Varieties Of Alfalfa
How To Select the Right Variety of Alfalfa?
To choose the right alfalfa variety, follow these steps:
- Consider your region’s climate and weather conditions.
- Determine your intended use, whether it’s hay production, grazing, or both.
- Check for resistance to local pests and diseases.
- Assess the variety’s yield potential and forage quality.
- Consult with local agricultural experts or extension services for recommendations tailored to your area.
Selecting the right variety ensures optimal alfalfa growth and productivity.
5 Best Alfalfa Varieties
let’s explore five of the best alfalfa varieties, considering climate, intended use, and why you might choose them:
1. Alfalfa Variety: Vernal
- Climate: Vernal is a versatile alfalfa variety suitable for a wide range of climates. It performs well in both cool and warm regions.
- Intended Use: Vernal is an excellent choice for hay production. It has a reputation for early spring growth, making it ideal for harvesting high-quality alfalfa hay.
- Why Choose: Farmers choose Vernal for its rapid spring growth, which allows for early harvests and superior hay quality. It is well-suited for areas with unpredictable weather patterns.
2. Alfalfa Variety: Alfagraze
- Climate: Alfagraze is adaptable to various climates, making it suitable for both cool and warm regions.
- Intended Use: This variety is primarily chosen for grazing purposes due to its fine stems and leafy characteristics, making it highly palatable for livestock.
- Why Choose: Alfagraze is preferred for grazing systems because of its excellent regrowth after grazing, providing a consistent and nutritious food source for livestock throughout the season.
3. Alfalfa Variety: Cody
- Climate: Cody performs well in regions with cold winters and is known for its cold tolerance.
- Intended Use: Cody is an exceptional choice for hay production, particularly in colder climates. It has a high leaf-to-stem ratio, contributing to high-quality hay.
- Why Choose: Farmers in colder climates favor Cody for its ability to thrive in harsh winter conditions. Its high leaf content results in hay that is both nutritious and appealing to livestock.
4. Alfalfa Variety: Ranger
- Climate: Ranger is known for its drought tolerance, making it suitable for arid or semi-arid climates.
- Intended Use: It is chosen for both hay and grazing purposes, making it versatile for regions with water scarcity.
- Why Choose: Ranger’s ability to withstand dry conditions and still provide decent yields makes it a top choice in areas where water availability is a concern. It’s a reliable option for maintaining forage production during droughts.
5. Alfalfa Variety: WL 341HQ
- Climate: WL 341HQ is adaptable to various climates, making it versatile for a range of regions.
- Intended Use: This variety is selected for its dual-purpose characteristics, suitable for both hay production and grazing.
- Why Choose: Farmers opt for WL 341HQ when seeking a versatile alfalfa variety that can meet multiple needs. It offers a balance between hay quality and regrowth for grazing.
Picking the right alfalfa type hinges on your local weather, planned purpose, and agricultural targets. These five types are among premier selections for diverse situations, making sure you can identify one that fits your distinctive farming circumstances and aims
Chapter 3: 10 Easy Steps To Prepare Ground For Alfalfa
How Do You Prepare Ground For Alfalfa? – 10 Easy Steps
Preparing the ground for alfalfa is a crucial step to ensure a successful crop.
Here’s a 10 step-by-step guide on how to prepare the ground for alfalfa without using commas:
Step 1. Clear the Area:
Begin by clearing the selected area of any debris, rocks, and weeds. Remove any obstructions that could hinder the growth of alfalfa.
Step 2. Soil Test:
Conduct a comprehensive soil test to assess the nutrient levels and pH of the soil. This step is essential to determine if any soil amendments are needed to create optimal conditions for alfalfa growth.
Step 3. Plowing or Tilling:
Use a plow or tiller to break up the soil. This process helps create a fine seedbed by loosening the soil and making it more receptive to planting. The depth of plowing or tilling depends on your specific soil type but is typically around 6 to 8 inches deep.
Step 4. Level the Field:
Properly level the field to avoid low spots where water can collect. An even surface helps prevent waterlogging, which can be detrimental to alfalfa.
Step 5. Incorporate Soil Amendments:
Based on the results of your soil test, consider incorporating necessary soil amendments. Common amendments include lime to adjust pH or additional nutrients like phosphorus and potassium. Ensure even distribution of these amendments.
Step 6. Seedbed Preparation:
After plowing or tilling, use a cultipacker or roller to firm the soil surface. This step is essential to provide good seed-to-soil contact, which promotes successful germination.
Step 7. Final Soil Preparation:
Ensure the soil is well-prepared and free of clods or large stones. A smooth seedbed with a fine texture is ideal for alfalfa planting.
Step 8. Address Drainage:
Alfalfa requires well-drained soil. If your field has drainage issues, consider installing drainage tiles or ditches to prevent waterlogging.
Step 9. Weed Control:
Before planting, implement weed control measures such as herbicides or mechanical cultivation to reduce competition from weeds. This is particularly important in the early stages of alfalfa growth.
Step 10. Seed Sowing:
Finally, sow the alfalfa seeds evenly over the prepared seedbed. Follow the recommended seeding rate for your specific variety and goals. Afterward, use a cultipacker or roller again to press the seeds into the soil, ensuring good seed-to-soil contact.
Proper ground preparation is critical for the establishment of a healthy alfalfa crop. Following these steps will set the stage for successful alfalfa growth and maximize your yields.
Chapter 4: How To Plant Alfalfa
How to Plant Alfalfa – 10 Easy Steps
Step 1. Select a Suitable Site:
Choose a well-drained field with good sunlight exposure for your alfalfa crop. Adequate sunlight is essential for healthy growth.
Step 2. Soil Testing:
Conduct a soil test to determine the pH level and nutrient content of the soil. Adjust soil conditions as needed based on the test results.
Step 3. Prepare the Seedbed:
Use a plow or tiller to break up the soil to a depth of about 6 to 8 inches. Create a smooth, fine seedbed to ensure good seed-to-soil contact.
Step 4. Seed Selection:
Choose a high-quality alfalfa seed variety that suits your region and intended use. Follow the recommended seeding rate for the selected variety.
Step 5. Seed Sowing:
Broadcast the alfalfa seeds evenly over the prepared seedbed. Use a seed spreader or spread the seeds by hand.
Step 6. Press Seeds into Soil:
After sowing, use a cultipacker or roller to press the seeds gently into the soil. This step improves seed-to-soil contact, aiding germination.
Step 7. Fertilize as Needed:
Apply fertilizer based on soil test recommendations or local agricultural guidelines. Alfalfa requires adequate nutrients for optimal growth.
Step 8. Irrigation:
Ensure consistent soil moisture, especially during the germination and establishment phase. Proper irrigation is crucial for successful alfalfa growth.
Step 9. Weed Control:
Implement weed control measures to keep the field free of competing weeds. This can include herbicides or mechanical cultivation.
Step 10. Monitor and Maintain:
Regularly monitor the alfalfa field for pests, diseases, and nutrient deficiencies. Address any issues promptly to maintain healthy growth.
What Is The Growth Stages Of Alfalfa
Alfalfa goes through several distinct growth stages:
Establishment Stage: This stage occurs from planting until the first cutting or grazing. Alfalfa establishes a strong root system during this time.
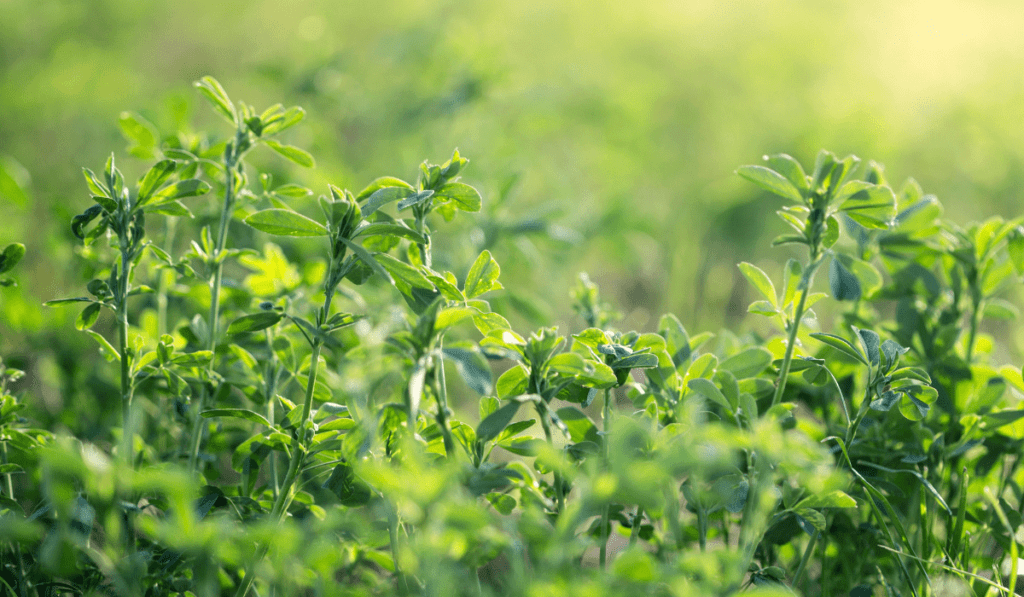
Vegetative Stage: During this stage, alfalfa produces leaves and stems but no flowers. It’s a critical period for building biomass.
Bud Stage: Alfalfa begins to form buds, signaling the transition from vegetative to reproductive growth.
Early Bloom Stage: The plant starts to produce purple or blue flowers. This stage is ideal for hay production due to high forage quality.
Full Bloom Stage: Alfalfa is in full flower, but forage quality begins to decline. It’s still suitable for hay but less ideal for high-quality forage.
Late Bloom Stage: The plant continues to bloom, and forage quality decreases further. It’s less suitable for hay but can be grazed.
Maturity Stage: Alfalfa reaches full maturity, and forage quality is low. It’s generally not recommended for hay production but can be grazed or cut for lower-quality hay.
Understanding these growth stages helps you make informed decisions about when to harvest or graze alfalfa for optimal forage quality and yield.
Chapter 5: How To Grow And Care For Alfalfa
5 Steps to Care for Your Alfalfa Plants
Caring for alfalfa plants effectively involves a series of ongoing steps to ensure their health and productivity. Here are five essential steps to follow:
1. Watering:
- Young Alfalfa Plants: Consistent watering is crucial for young alfalfa plants to establish their root systems. Water deeply once or twice a week, adjusting based on weather conditions and soil moisture.
- Mature Alfalfa Plants: As alfalfa matures and develops deeper root systems, reduce the frequency of watering. However, during hot and dry periods, they may still require more frequent watering to maintain optimal growth.
2. Pruning and Training:
- Regular Pruning: To maintain plant health and encourage air circulation, regularly prune your alfalfa plants. Remove any damaged or diseased growth.
- Support and Training: Utilize support structures such as stakes, cages, or trellises to keep alfalfa plants upright. This is essential to prevent the forage from touching the ground, reducing the risk of disease and maintaining overall plant health.
3. Fertilization:
- Soil Testing: Conduct soil tests to determine the specific nutrient needs of your alfalfa plants.
- Balanced Fertilizer: Use a balanced fertilizer suitable for alfalfa, typically during the growing season. Follow application guidelines to avoid over-fertilization.
- Organic Options: Consider incorporating organic materials like compost, well-rotted manure, or homemade organic fertilizers to enhance soil fertility.
4. Pest and Disease Control:
- Regular Monitoring: Keep a close watch for signs of pests or diseases, which can be common in alfalfa plants. Early detection is key to effective management.
- Integrated Pest Management (IPM): Employ a combination of cultural, mechanical, biological, and chemical controls to manage pests and diseases in a sustainable and environmentally friendly way.
5. Mulching and Soil Care:
- Mulch Application: Apply organic mulch around the base of alfalfa plants to conserve soil moisture, regulate temperature, and suppress weeds.
- Soil Health: Maintain soil health by ensuring good drainage and occasional aeration. Periodically add organic matter to keep the soil fertile and supportive of alfalfa growth.
To make your alfalfa plants strong and produce useful feed, do these five steps. Each plant and place are one of a kind so watch your alfalfa plants closely. Change your care methods if needed. Regularly make sure they’re healthy and growing well, and fix things when problems or changes in the area come up.
Chapter 6: How To Cut Alfalfa By Hand
What Is The Best Time To Trim Alfalfa?
The best time to trim or harvest alfalfa depends on its intended use and the growth stage of the plant.
Here are some guidelines for when to trim alfalfa based on its purpose:
For Hay Production:
- The optimal time to harvest alfalfa for hay is when it’s in the bud to early bloom stage.
- This stage typically occurs when alfalfa plants are about 18 to 24 inches tall, and you can see the first purple or blue flowers beginning to appear.
- Harvesting at this stage ensures a balance between high forage quality and yield.
- Waiting too long, until full bloom or maturity, may result in lower forage quality and reduced nutritional value.
For Grazing:
- If you’re growing alfalfa for grazing purposes, the timing of trimming can vary depending on your livestock’s needs.
- You can begin grazing alfalfa when it reaches a height of about 6 to 8 inches.
- Rotate grazing to allow the plants to recover between grazing periods.
- Avoid overgrazing, which can weaken the stand and reduce future yields.
For Seed Production:
- If you’re growing alfalfa for seed production, you’ll need to allow the plants to mature further.
- Harvest for seed when the majority of pods are mature and brown.
- This is typically later in the growing season, after the flowering stage.
Always check your alfalfa field to figure out the best time for trimming. This depends on your aims and local growth conditions. Remember, alfalfa can grow at differing rates due to things like weather and soil health. So, changing the timing to match this is vital for the best outcome.
How to Trim Alfalfa for Hay Production?
Trimming or harvesting alfalfa involves several steps to ensure a successful and productive process. Here’s a guide on how to trim alfalfa for hay production:
1. Timing:
- As mentioned earlier, timing is critical. Harvest alfalfa when it’s in the bud to early bloom stage, typically when the plants are around 18 to 24 inches tall and the first purple or blue flowers appear.
2. Equipment Preparation:
- Ensure your harvesting equipment, such as a mower or swather, is in good working condition and properly adjusted.
- Sharpen cutting blades to make clean cuts and minimize plant stress.
3. Weather Considerations:
- Choose a day for harvesting when the weather is dry and sunny.
- Avoid harvesting during wet or dewy conditions, as moisture can reduce hay quality and cause mold.
4. Set Cutting Height:
- Adjust your cutting equipment to leave a stubble height of about 2 to 4 inches. This helps protect the crowns of the alfalfa plants, ensuring regrowth.
5. Harvesting:
- Begin cutting the alfalfa with your equipment at the appropriate height.
- Allow the cut forage to wilt in the field for a few hours. This reduces moisture content and helps with curing.
6. Raking and Windrowing:
- After wilting, use a hay rake to form the cut alfalfa into windrows or rows.
- Ensure the windrows are well-formed for efficient drying.
7. Drying:
- Alfalfa must be dried to a moisture content of around 15% for proper hay storage.
- Depending on weather conditions, drying can take several days. Monitor moisture levels to determine when it’s ready for baling.
8. Baling:
- Once the alfalfa is sufficiently dried, use a baler to create hay bales.
- Properly adjust the baler to make firm and uniform bales.
9. Storing:
- Store the alfalfa hay bales in a cool, dry place to prevent mold and spoilage.
- Stack bales on pallets or elevated surfaces to prevent moisture absorption from the ground.
10. Maintenance:
- Regularly inspect and maintain your harvesting equipment to ensure it’s ready for the next cutting.
Keep in mind, precise timing and techniques can differ based on your climate, gear, and specific alfalfa type. Watching your alfalfa field closely is vital. Alter your harvest plan when necessary. This way, you’ll get the best feed quality and output. Correct harvesting practices are key. They help produce top-notch alfalfa hay for your livestock or sale.
Chapter 7: Common Disease Alfalfa
5 Common Alfalfa Plant Diseases (Identify & Treat)
Identifying and treating common alfalfa plant diseases is crucial to maintain a healthy and productive crop.
Here are five common alfalfa plant diseases, along with methods to identify and treat them:
1. Anthracnose:
- Identification: Anthracnose is characterized by dark, irregular-shaped lesions on leaves and stems. These lesions may have a sunken appearance.
- Treatment: To manage anthracnose, implement crop rotation, ensure proper field drainage, and select disease-resistant alfalfa varieties. Fungicides may also be used in severe cases.
2. Phytophthora Root Rot:
- Identification: This soil-borne disease causes wilting, yellowing of leaves, and root rot. Infected plants often show stunted growth.
- Treatment: Improve soil drainage and avoid waterlogging. Select resistant varieties and consider fungicide applications when necessary.
3. Bacterial Wilt:
- Identification: Bacterial wilt leads to wilting and yellowing of leaves, often followed by plant death. Cutting through the stem may reveal brown, slimy tissue.
- Treatment: There are no effective chemical treatments for bacterial wilt. Implement crop rotation, remove and destroy infected plants, and avoid planting alfalfa in fields with a history of the disease.
4. Verticillium Wilt:
- Identification: Verticillium wilt causes wilting, yellowing, and browning of leaves. The vascular system of infected plants may display dark streaks.
- Treatment: Choose resistant alfalfa varieties. Crop rotation with non-host crops is essential. Fungicides may provide limited control in severe cases.
5. Alfalfa Mosaic Virus:
- Identification: Symptoms include mosaic patterns on leaves, stunted growth, and reduced yield.
- Treatment: Alfalfa mosaic virus is primarily managed through prevention. Use virus-free seed and control aphid vectors. Infected plants should be removed to prevent further spread.
Consistently checking your alfalfa crops and quickly spotting diseases is key to handling it right. You can really lower the chance of disease by using good farming traditions like rotating crops, allowing enough drying, and choosing illness-fighting types. If needed, don’t hesitate to ask agri-extension services or pros to help you choose the best fixes and preventive steps.
Chapter 8: Common Pests Alfalfa
5 Common Alfalfa Plant Pests (Identify & Treat)
Identifying and treating common alfalfa plant pests is essential to protect your crop’s health and yield. Here are five common alfalfa plant pests, along with methods to identify and treat them:
1. Aphids:
- Identification: Aphids are small, soft-bodied insects that can be green, yellow, or brown. They typically feed on the undersides of leaves and excrete honeydew, which can lead to sooty mold growth.
- Treatment: Control aphids through natural predators like ladybugs, lacewings, and parasitic wasps. In severe cases, use insecticidal soaps or neem oil.
2. Alfalfa Weevil:
- Identification: Alfalfa weevil larvae are green with a white stripe along their back. They feed on alfalfa foliage, leaving behind irregular holes.
- Treatment: Monitor alfalfa fields regularly for signs of weevil damage. Apply insecticides if economic thresholds are reached. Early cutting can also help control weevil populations.
3. Cutworms:
- Identification: Cutworms are caterpillar-like larvae that cut through the base of alfalfa plants, causing them to wilt and die.
- Treatment: Implement preventive measures like trap crops or use insecticides when cutworm populations are high. Cultural practices such as shallow planting can reduce damage.
4. Grasshoppers:
- Identification: Grasshoppers are large, hopping insects that consume alfalfa leaves and stems. They can cause extensive damage.
- Treatment: Consider using insecticides if grasshopper populations are significant. Reducing vegetation around fields can help deter grasshoppers from invading.
5. Leafhoppers:
- Identification: Leafhoppers are small, wedge-shaped insects that feed on alfalfa sap. Their feeding causes stippling or yellowing of leaves.
- Treatment: Predatory insects like ladybugs and spiders can help control leafhopper populations. In severe cases, consider applying insecticides.
A solid plan for managing pests “Integrated pest management (IPM)” is key in alfalfa farming. This involves watching for pests, leveraging helpful bugs, and only using pesticides when needed, according to set rules. Consistently checking your alfalfa fields and stepping in early can prevent pest harm and support crop health. Look to your regional farming advice services for further tips on pest control specific to your area.
Conclusion
growing and maintaining a thriving alfalfa crop requires careful attention to detail and a proactive approach to disease and pest management. By following the steps outlined in this comprehensive guide, you can ensure the successful planting, care, and harvesting of your alfalfa plants. From selecting the right variety to identifying and treating common diseases and pests, these practices will help you achieve bountiful alfalfa yields that elevate your agriculture game to new heights.
Remember that alfalfa farming is a dynamic process that responds to local conditions and changing circumstances. Regular monitoring of your alfalfa fields and a willingness to adapt your strategies when necessary are key to achieving the best results. Whether you’re cultivating alfalfa for hay production, grazing, or seed production, a combination of knowledge, diligence, and sustainable farming practices will lead to a successful alfalfa crop that benefits both your livestock and your agricultural endeavors.