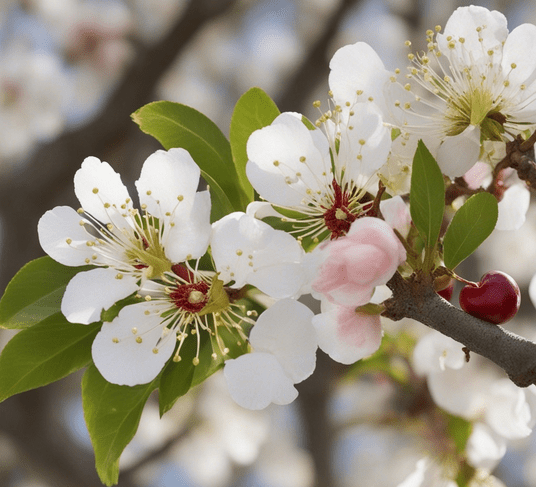
Ever wondered how to turn your space into a cherry blossom haven? The answer lies in the art of planting cherry trees.
In our latest guide, we unveil the secrets to successfully cultivating these iconic trees – from choosing the right variety to ensuring optimal soil conditions.
Join us on this journey, and by the end of this blog post, you’ll not only be a cherry tree planting pro but also on your way to a blooming garden filled with the enchanting beauty of cherry blossoms.
Ready to make your landscape a springtime masterpiece? Let’s dive in!
[ez-toc]
Chapter 1: Planting Basic of Cherry Tree
What Month Is Best To Plant Cherry Trees?
Plant cherry trees in late winter or early spring, often between February and April. These months are best since the trees are dormant and the soil can be easily worked. This timing helps the tree grow strong roots before the growth season starts. Hot summers are not good for planting cherry trees.
Where Does A Cherry Tree Grow Best?
Cherry trees grow best in regions with specific climate conditions.
Here are some general considerations:
Climate: Cherry trees thrive in regions with cold winters and moderate to warm summers. They require a period of winter chill to set fruit properly. The exact requirements can vary depending on the cherry variety.
Hardiness Zones: Different cherry varieties are suitable for different USDA Hardiness Zones. Sweet cherry varieties often do well in Zones 5-7, while sour cherry varieties are more cold-hardy and can grow in Zones 4-7. It’s essential to choose a cherry variety that matches your specific zone.
Sunlight: Cherry trees require full sun, which means they should receive at least 6-8 hours of direct sunlight daily. Plant them in a location where they can get ample sunlight throughout the day.
Soil: Well-draining soil is crucial for cherry trees. They prefer slightly acidic to neutral soil with good fertility. Amending the soil with organic matter can help improve soil quality.
Protection from Frost: Cherry trees are susceptible to late spring frosts that can damage blossoms and reduce fruit production. Plant them in a location with good air drainage to reduce the risk of frost damage.
Good Air Circulation: Adequate air circulation around cherry trees helps prevent diseases. Avoid planting them in areas with poor airflow.
Pollination: Some cherry varieties require cross-pollination, which means you’ll need to plant at least two different cherry varieties that bloom at the same time for proper fruit production.
Before planting a cherry tree, it’s essential to research the specific variety that suits your climate and growing conditions. Local nurseries and agricultural extension services can provide valuable guidance on cherry tree varieties that are well-suited to your area.
Chapter 2: Space For Cherry Trees
How much space does a cherry tree need?
Cherry trees, in their quest for healthy growth and fruitful yield, necessitate ample space. For optimal thriving conditions, it is advisable to plant cherry trees with a spacing range of 20 to 25 feet between each tree. This strategic spacing fosters air circulation, sunlight exposure, and root expansion, thereby enhancing the tree’s well-being and fruit production.
Where is the best place to grow cherry trees?
Selecting the optimal location for cherry trees is paramount for their sustained prosperity. The ideal placement involves full sunlight exposure lasting 6 to 8 hours daily. It’s crucial to ensure proper soil drainage to avoid waterlogged roots, as cherry trees are vulnerable to root rot in excessively damp conditions. Furthermore, assessing the local climate is essential; seek a sheltered location to shield the trees from potent winds, particularly during the flowering and fruit-setting phases.
How close to the house can I plant a cherry tree?
Planting a cherry tree near a house brings both beauty and challenges. The allure of blossoms and fruits must be balanced with considerations of root spread and potential structural damage. Careful planning,
When considering the placement of cherry trees, it’s a delightful idea to have them nearby for easy fruit access. However, ensuring safety is pivotal. A recommended practice is to maintain a distance of 10 to 15 feet from any structures like houses or outbuildings. This spatial allowance serves to avert future complications, such as roots interfering with foundations or branches encroaching on buildings. Moreover, it facilitates hassle-free tree care without posing risks to your property.
Chapter 3: Varieties & Season
Best Season To Plant Cherry Trees
Planting cherry trees appropriately ensures their successful growth. Late winter to early spring is the ideal time for planting when the tree is dormant, promoting robust root development before the growing season. This period affords optimal conditions for root growth and minimizes the risk of transplant shock. Avoiding planting during hot summer months is crucial, as young cherry trees can be significantly affected by the stress of high temperatures.
How Many Varieties Of Cherry Trees Are There?
Cherry trees exist in a diverse array of varieties, each distinguished by its unique attributes such as taste, fruit size, and ability to withstand cold temperatures. Typically, cherry tree varieties fall into two primary categories: sweet cherries (Prunus avium) and sour cherries (Prunus cerasus). Further segmenting these groups are numerous cultivated types, which complicates precise enumeration. Notable sweet cherry varieties encompass Bing, Rainier, and Stella, while sour cherries include Montmorency and Morello.
5 Best Varieties Of Cherry Trees
1. Bing Cherry (Prunus avium ‘Bing’)
Bing cherries are well-known for their sweet, juicy fruit and deep red skin. They are a favorite for fresh eating and are often considered one of the best sweet cherry varieties.
2. Rainier Cherry (Prunus avium ‘Rainier’)
Rainier cherries are prized for their pale yellow to golden skin and exceptionally sweet and mild flavor. They are excellent for fresh consumption and are often used in desserts.
3. Montmorency Cherry (Prunus cerasus ‘Montmorency’)
Montmorency cherries are a popular sour cherry variety, known for their tartness. They are commonly used in pies, preserves, and cherry products.
4. Stella Cherry (Prunus avium ‘Stella’)
Stella cherries are a self-pollinating sweet cherry variety, making them an excellent choice for home gardens. They produce sweet, dark red fruit.
5. Lapins Cherry (Prunus avium ‘Lapins’)
Lapins cherries are a late-season sweet cherry variety known for their large, firm fruit with a sweet-tart flavor. They are often used for fresh eating and can be enjoyed straight from the tree.
These cherry tree varieties are just a few examples of the diverse options available to suit various tastes and growing conditions. When selecting a cherry tree variety, consider your local climate, the intended use of the fruit, and any specific requirements for pollination.
Chapter 4: Soil Preparation For Cherry Trees
How to Prepare Soil for Cherry Trees Step by step guideline
Preparing the soil for cherry trees is crucial for their long-term health and productivity. Here’s a step-by-step guideline on how to prepare the soil for cherry trees:
Step 1: Choose the Right Location
- Select a site that receives full sun, which means at least 6-8 hours of direct sunlight per day.
- Ensure proper drainage to prevent waterlogged soil, which can harm cherry trees.
Step 2: Test the Soil
- Conduct a soil test to determine the pH and nutrient levels in your soil.
- Cherry trees prefer slightly acidic to neutral soil with a pH between 6.0 and 7.0.
Step 3: Clear the Area
- Remove any grass, weeds, or debris from the planting area. Use a shovel or garden hoe to clear the ground effectively.
Step 4: Dig a Planting Hole
- Dig a planting hole that is twice as wide as the tree’s root ball and the same depth.
- The wider hole allows the roots to spread and establish more easily.
Step 5: Amend the Soil
- Mix the native soil with organic matter, such as compost or well-rotted manure, at a ratio of 1:1.
- This improves soil fertility and helps with moisture retention.
Step 6: Adjust pH if Needed
- If your soil test indicates a pH level outside the preferred range (6.0-7.0), amend it accordingly.
- To raise pH, add lime; to lower pH, add sulfur. Follow the product instructions for the appropriate amount.
Step 7: Create a Mound
- Create a small mound of soil at the bottom of the planting hole to support the tree’s root ball.
- Place the cherry tree in the center of the hole, making sure it sits at the same depth it was in the nursery container.
Proper soil preparation is an investment in the long-term health and productivity of your cherry tree. By following these steps and providing ongoing care, you can enjoy a bountiful harvest of delicious cherries for years to come.
Chapter 5: How To Plant Cherry Trees
How To Plant Cherry Trees 7 Easy Steps
Planting cherry trees is a rewarding endeavor that can provide you with delicious fruit for years to come. Here are 7 easy steps to plant cherry trees:
Step 1: Choose the Right Location
- Select a sunny location that receives at least 6-8 hours of direct sunlight per day.
- Ensure good air circulation to prevent disease.
Step 2: Prepare the Soil
- Test the soil to check its pH and nutrient levels.
- Cherry trees prefer slightly acidic to neutral soil with a pH of 6.0 to 7.0.
- Amend the soil with organic matter like compost or well-rotted manure to improve fertility and moisture retention.
Step 3: Dig a Planting Hole
- Dig a hole that is twice as wide as the root ball and of the same depth.
- Create a small mound of soil at the bottom of the hole to support the tree.
Step 4: Plant the Tree
- Gently remove the tree from its container or packaging.
- Place the tree in the center of the hole at the same depth it was in the nursery container.
- Backfill the hole with soil, firming it gently around the roots to remove air pockets.
Step 5: Water Thoroughly
- After planting, water the tree deeply to settle the soil and provide moisture to the roots.
- Use a soaker hose or a drip irrigation system for efficient watering.
Step 6: Apply Mulch
- Apply a 2-4 inch layer of organic mulch, such as wood chips or straw, around the base of the tree.
- Mulch helps retain moisture, suppress weeds, and regulate soil temperature.
Step 7: Provide Support
- Depending on the type of cherry tree (dwarf, semi-dwarf, or standard), consider staking the tree or installing a support system to help it establish an upright growth habit.
Chapter 6: How To Care For Cherry Trees
5 Common Care For Cherry Trees
Caring for cherry trees is essential to ensure their health and productivity. Here are five common care practices for cherry trees, along with guidance on when and how to prune them:
1. Watering:
- Cherry trees require consistent moisture, especially during dry spells. Ensure they receive about 1-2 inches of water per week.
- Water deeply, making sure the root zone is thoroughly soaked. A soaker hose or drip irrigation system can be helpful.
2. Fertilizing:
- Apply a balanced fertilizer in the early spring to provide essential nutrients for growth.
- Avoid excessive nitrogen, as it can lead to excessive foliage growth at the expense of fruit production.
3. Pest and Disease Management:
- Monitor your cherry trees regularly for signs of pests and diseases. Common issues include aphids, cherry fruit flies, and brown rot.
- Consider using organic or chemical treatments as needed to protect your trees.
4. Thinning:
- To ensure larger and healthier fruit, thin out excess cherries when they are still small and green. Leave space between each fruit for proper development.
- Thinning helps prevent branches from breaking due to the weight of the fruit.
5. Netting:
- Use bird netting to protect your cherry crop from hungry birds as the fruit ripens. This is especially important for sweet cherry varieties.
Pruning Cherry Trees
The best time to prune a cherry tree is during its dormant period, which typically occurs in late fall to early winter. Pruning during this time minimizes stress on the tree and reduces the risk of disease transmission. Here are some easy steps to prune cherry trees:
Step 1: Gather Your Tools
- Before you begin, ensure you have the necessary tools, including sharp pruning shears, loppers for thicker branches, and safety gear such as gloves and eye protection.
Step 2: Remove Dead or Diseased Wood
- Start by inspecting the tree for dead or diseased branches. Dead wood is often dry, brittle, and lacks buds or leaves. Cut these branches back to healthy tissue, making clean cuts.
Step 3: Remove Suckers and Water Sprouts
- Cherry trees can develop suckers (shoots emerging from the base of the tree) and water sprouts (vertical, fast-growing shoots). Remove these unwanted growths as they can divert energy from fruit production.
Step 4: Thin Out Crowded Branches
- Look for branches that are crossing over each other or growing too closely. Choose one of the competing branches to remove, leaving the stronger and healthier one.
Step 5: Maintain an Open Center or Vase Shape
- Prune to create an open center or vase shape in the tree. This allows better air circulation and sunlight penetration, reducing the risk of disease and improving fruit quality.
- Remove any branches growing toward the center of the tree.
Step 6: Reduce Height If Necessary
- If your cherry tree has grown too tall for convenient harvesting, you can reduce its height. Cut back the central leader (main trunk) to the desired height, making the cut just above a lateral branch.
Step 7: Step Back and Assess
- After each cut, step back and assess the tree’s overall shape and structure. Make additional cuts as needed to achieve the desired shape and balance.
Step 8: Clean Your Tools
- Once you’ve finished pruning, clean and disinfect your pruning tools to prevent the spread of disease to other plants.
Remember to make clean cuts to minimize damage and avoid leaving stubs, as they can attract pests and diseases. Proper pruning can improve the health and fruit production of your cherry tree, so take your time and prune with care.
Chapter 7: Common Disease Cherry Trees
5 Common Cherry Plant diseases (Identify & Treat)
Certainly! Here are five common cherry tree diseases, along with methods to identify and treat them:
1. Cherry Leaf Spot (Blumeriella jaapii)
- Identification: Look for small, dark, circular spots with a yellow halo on the leaves. Severe infections can lead to defoliation.
- Treatment: Apply fungicides as a preventive measure before symptoms appear. Remove and destroy infected leaves. Ensure good air circulation around the tree.
2. Brown Rot (Monilinia spp.)
- Identification: Brown rot causes browning, rotting, and shriveling of fruits. Infected fruits often develop a fuzzy, brown fungal growth.
- Treatment: Remove and destroy infected fruits promptly. Apply fungicides as recommended by a local extension service. Prune the tree for better air circulation.
3. Powdery Mildew (Podosphaera spp.)
- Identification: Powdery mildew appears as a white, powdery substance on leaves and stems, often causing leaves to curl and distort.
- Treatment: Apply fungicides as soon as symptoms appear. Prune overcrowded branches to improve air circulation. Avoid excessive nitrogen fertilization.
4. Cherry Fruit Fly (Rhagoletis spp.)
- Identification: Adult flies lay eggs in developing cherries. Larvae infest the fruit, causing premature dropping and fruit deformation.
- Treatment: Use fruit bagging or traps to monitor and reduce adult fly populations. Apply insecticides as recommended by local authorities. Harvest fruits promptly.
5. Black Knot (Dibotryon morbosum)
- Identification: Black knot causes black, warty growths on branches. Infected branches become swollen and distorted.
- Treatment: Prune and remove infected branches during the dormant season, making cuts well below the knots. Burn or dispose of pruned material to prevent further spread.
Always keep an eye on your cherry tree to find signs of diseases, and act fast if you see any. Good cleaning habits, like removing fallen leaves and fruit, can help lessen disease threats. Also, think about choosing cherry tree types that resist diseases when planting, to lessen the chance of disease.
Chapter 8: Common Pest Cherry Trees
5 Common Cherry Plant Pests (Identify & Treat)
Here are five common cherry tree pests, along with methods to identify and treat them:
1. Cherry Fruit Fly (Rhagoletis spp.)
- Identification: Adult cherry fruit flies are small, approximately 1/4 inch in length, and have distinctive black and white markings. Larvae infest cherries, causing them to become disfigured and drop prematurely.
- Treatment: Use sticky traps to monitor adult fly activity. Apply insecticides at the appropriate times based on local recommendations. Bagging fruit with fine mesh bags can also protect against infestation.
2. Aphids (Various Species)
- Identification: Aphids are tiny, soft-bodied insects that come in various colors. They cluster on the undersides of leaves and excrete honeydew, which can lead to sooty mold.
- Treatment: Hose off aphids with a strong stream of water. Release natural predators like ladybugs or lacewings. Apply insecticidal soap or neem oil as a last resort.
3. Japanese Beetles (Popillia japonica)
- Identification: Japanese beetles are metallic green with coppery-brown wing covers. They skeletonize cherry leaves by feeding on the upper surface, leaving a lacy appearance.
- Treatment: Handpick beetles and drop them into soapy water. Use traps to capture adults. Apply neem oil or pyrethrin-based insecticides when infestations are severe.
4. Cherry Slug (Caliroa cerasi)
- Identification: Cherry slugs are small, greenish-black larvae that feed on cherry leaves, leaving behind skeletonized foliage.
- Treatment: Handpick and destroy the slugs. Prune heavily infested leaves and apply neem oil or insecticidal soap to deter them.
5. Spider Mites (Tetranychus urticae)
- Identification: Spider mites are tiny arachnids that suck the sap from leaves, causing stippling and webbing on the undersides of leaves.
- Treatment: Increase humidity around the tree by spraying with water. Introduce predatory mites or ladybugs to control spider mite populations. Use insecticidal soap or neem oil if necessary.
Always keep an eye out on your cherry tree for bug signs, especially when it’s growing season. Finding them early and taking action stops bad bug problems. Using smart bug control methods, like using live controls and trap crops, can also help manage these pests.
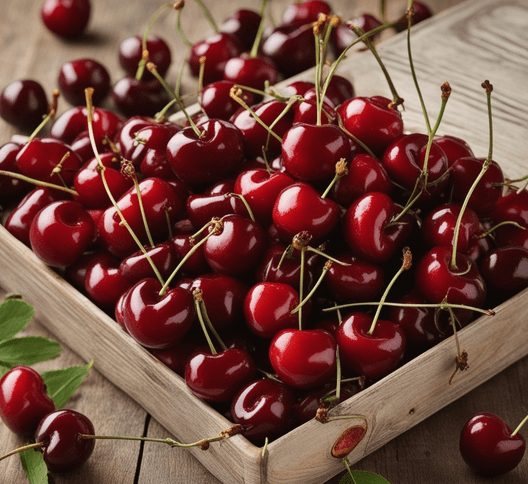
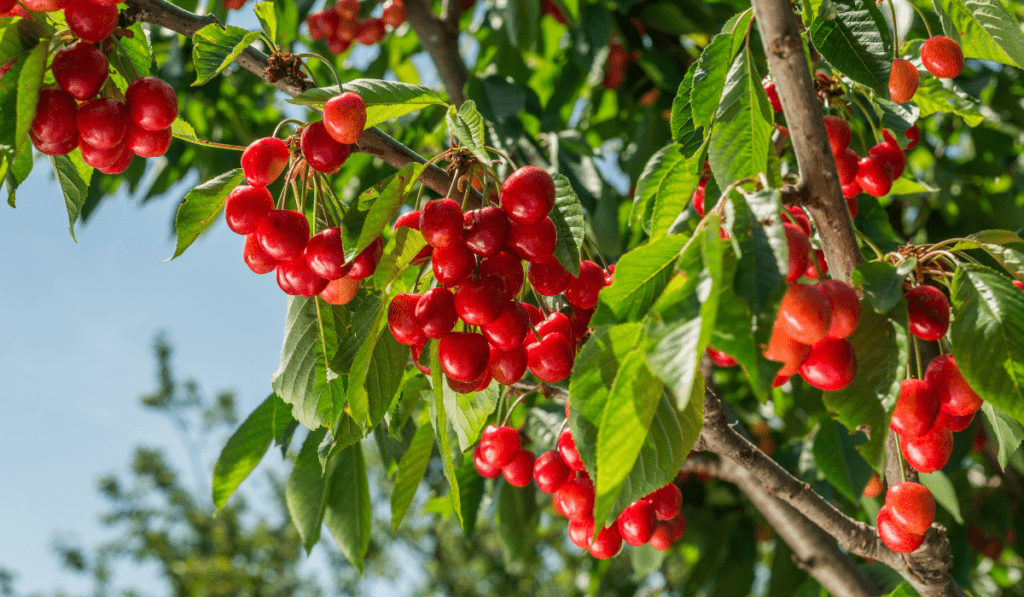
Chapter 9: How To Harvest & Store Cherry
How Do You Know When Cherries are Ready to Pick?
Color Change: Cherries should have a uniform color, specific to their variety, without any green or unripe spots. They typically change from green or yellow to red or dark purple, depending on the variety.
Firmness: Ripe cherries will yield slightly to gentle pressure when touched. They should be firm but not overly hard or mushy.
Ease of Separation: Ripe cherries should come off the tree easily when gently twisted or pulled. If they resist, they may need more time to ripen on the tree.
Size and Shape: Familiarize yourself with the expected size and shape of your specific cherry variety when they are ripe. Varieties can differ in size and appearance.
Proper Harvesting Techniques for Cherries
Gentle Handling: Handle cherries gently to avoid bruising or damaging the fruit. Damaged cherries can quickly deteriorate.
Twist-and-Pull Method: To harvest cherries, gently twist and pull them from the tree to avoid damaging the stem or tree branches.
Harvesting Tools: If you encounter stubborn stems, you can use garden scissors or pruners to snip the cherries from the tree. This prevents damage to both the plant and the fruit.
Inspect for Damage: As you pick cherries, inspect each one for any signs of damage, cracks, or blemishes. Remove any damaged cherries immediately to prevent them from affecting the others.
Storing Process for Cherries
Ideal Conditions: Store ripe cherries at room temperature, away from direct sunlight. It’s best to keep them in a single layer to prevent pressure damage and allow air circulation.
Refrigeration: If you need to extend their shelf life, you can refrigerate fully ripe cherries. However, keep in mind that refrigeration can affect their texture and flavor, so use them within a few days.
Regular Inspection: Regularly check stored cherries for signs of decay or mold. Remove any affected cherries promptly to prevent them from spoiling others.
Ethylene Gas: Cherries, like other fruits, emit ethylene gas, which can affect their ripening. Keep cherries away from ethylene-sensitive produce to avoid premature ripening.
Ripening Process: To ripen unripe cherries, store them at room temperature with the stems on. Placing them in a paper bag with a ripe banana or apple can speed up the ripening process.
Moisture Avoidance: Ensure that cherries are dry when stored, as excess moisture can lead to mold growth.
Freezing: For long-term storage, consider freezing cherries. Freeze them individually on a baking sheet, and then transfer them to airtight containers or freezer bags.
By following these guidelines for cherries, you can ensure that you harvest them at their peak of ripeness and store them properly to enjoy their delicious flavor.
Embark on the journey of cultivating your own cherry blossom haven with newfound expertise. From the ideal planting season to selecting the perfect variety, our comprehensive guide unveils the secrets of cherry tree care. Whether you’re mastering the art of soil preparation, choosing the optimal space, or navigating the diverse cherry varieties, you’re now equipped with the knowledge to transform your landscape into a springtime masterpiece. As you explore the nuances of pruning, pest management, and harvesting, envision a blooming garden filled with the enchanting beauty of cherry blossoms. Your newfound cherry tree wisdom awaits—let the blossoming begin!