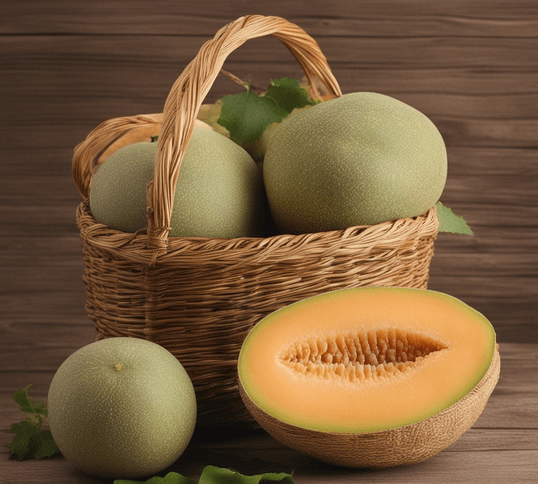

Have you ever wanted to grow sweet cantaloupes in your backyard? Wondering how to do it? Well, you’re in the right place! In this blog post, we’ll show you step by step how to plant and care for cantaloupe plants. When you’re done reading, you’ll know everything you need to grow your own tasty cantaloupes. Get ready for a fun journey – let’s start growing your very own cantaloupes!
[ez-toc]
Chapter 1: Planting Basic of Cantaloupe Tree
Do Cantaloupe Plants Need To Climb?
Cantaloupe plants aren’t natural climbers like other vining foods, say, cucumbers or pole beans. Still, they come with lengthy, trailing vines. Plus, with the right type of support like trellises or upright structures, you can lead them to grow vertically. This activity is widely known as “training” cantaloupe plants to go vertical.
What Is The Best Time To Plant Cantaloupe?
The ideal time to sow cantaloupe (Cucumis melo) seeds shifts based on the weather and conditions where you live. Cantaloupes love hot weather, so think about your area’s frost-free dates and average temperatures.
Below are some simple tips:
1. Planting in Spring
In areas where winters are gentle and springs are early, cantaloupe seeds or young plants can be planted once there’s no risk of frost. Usually, this happens in spring when the soil’s temperature hits about 60°F (15°C). Always refer to your local frost dates for the best planting time.
2. Planting in Late Spring to Early Summer
Many zones find the period from late spring to early summer perfect for cantaloupe planting. It’s because the earth is hot, with zero freezing weather. Keep a soil temperature of 70°F to 90°F (21°C to 32°C). This range helps seeds sprout and grow best.
3. Planting in Warmer Climates
In places where it’s warm, having mild cold seasons and super hot sunny seasons, you get a longer time to plant. You usually can put cantaloupe seeds in the ground in the ending part of spring, starting part of summer, and even in the early part of fall.
4. Growing from Seedlings
When you want to grow cantaloupe, you might choose seedlings instead of seeds. Wait until they have two real leaves. Also, make sure there’s no chance of frost. This could mean you’re planting sooner than if you were using seeds.
Remember, cantaloupes need warm dirt and air to really bloom. Planting too soon while the dirt is still chilly? That can cause bad sprouting and slow growth. But, if you wait till late summer, you’re risking a short growing period before the inaugural frost.
For the optimal time to plant cantaloupes in your area, you should check with your local agricultural office. Online tools can provide frost dates and growth tips for your area too. This helps you understand when it would be best to plant cantaloupes.
Is It Better To Grow Cantaloupe On The Ground Or Trellis?
Planting cantaloupes on a trellis can be seen as the superior choice for a few reasons. Choosing to grow cantaloupes on the ground or on a trellis is based on a few things. It considers your garden size, weather, and what you like..
Both methods have their advantages and Disadvantages:
Growing Cantaloupes on a Trellis
Advantages:
- Air Circulation: Improved air circulation around the plant can reduce the risk of fungal diseases.
- Space Efficiency: Ideal for smaller gardens or urban spaces.
- Reduced Pest and Disease Exposure: Elevated fruits are less accessible to some pests and less prone to soil-borne diseases.
- Easier Harvesting: Picking fruit from a trellis can be less physically demanding.
Disadvantages:
- Support Requirements: Requires sturdy trellises and careful attention to support the weight of the fruit.
- Increased Labor: Setting up and maintaining a trellis system is more labor-intensive.
- Watering Needs: Plants in raised or trellised systems may require more frequent watering.
Growing Cantaloupes on the Ground
Advantages:
- Natural Support: The ground provides natural support for the weight of the growing cantaloupes.
- Less Labor Intensive: It requires less setup compared to building a trellis system.
- Space Utilization: Ideal for larger garden spaces where spreading plants is not an issue.
Disadvantages:
- Disease and Pest Exposure: More susceptible to soil-borne diseases and pests.
- Fruit Damage: Fruit resting on the ground can rot or be damaged more easily.
- Moisture Issues: Can suffer from uneven moisture levels and rot in heavy rain.
Chapter 2: Varieties of Cantaloupe Plant
Here’s a list of 10 cantaloupe varieties with explanations of why you might choose them based on temperature conditions:
1. Hale’s Best Jumbo
Known for its sweet, aromatic flavor and large fruit size.
Why Choose: Excellent for warm climates with hot summers, as it thrives in high-temperature conditions, producing sweet and aromatic fruit.
2. Ambrosia
Celebrated for its exceptionally sweet flavor and pleasant aroma.
Why Choose: Ideal for regions with scorching summers, as it offers exceptionally sweet flavor and juicy flesh, even in extreme heat.
3. Athena
Offers good disease resistance and sweet, juicy flesh.
Why Choose: Well-suited to areas prone to heatwaves, with good disease resistance and deliciously sweet taste in hot weather.
4. Sugar Queen
Known for its high sugar content and suitability for hot climates.
Why Choose: Suited for hot and dry climates, as it boasts high sugar content and maintains juicy flesh in arid conditions.
5. Crimson Sweet
A red-fleshed variety that can be grown in cooler regions.
Why Choose: Can be chosen in cooler regions, as it adapts well to mild temperatures and still delivers quality fruit.
6. Earli-Dew
Early-maturing, ideal for regions with shorter growing seasons.
Why Choose: Perfect for regions with shorter growing seasons or milder summers due to its early maturity and reliable fruiting.
7. Honey Rock
Known for its honey-like flavor and firm, orange flesh.
Why Choose: Adaptable to moderate temperatures, offering a honey-like flavor and firm, orange flesh even in cooler climates.
8. Minnesota Midget
Compact and perfect for small gardens or containers.
Why Choose: Ideal for small gardens or cooler climates, producing small, sweet cantaloupes that thrive in less extreme temperatures.
9. Hearts of Gold
An heirloom variety with sweet, fragrant flesh.
Why Choose: Suitable for a range of temperatures, known for its sweet, fragrant flesh that retains quality in diverse conditions.
10. Sivan F1
A hybrid with excellent disease resistance and a classic cantaloupe flavor.
Why Choose: Excels in regions with temperature fluctuations and offers excellent disease resistance, ensuring fruit quality in changing weather.
Picking the perfect cantaloupe variety requires thought on your local weather and its changes. Each kind has its favorite temperatures, and can handle only so much heat or cold. This lets you choose the best fit for your weather, for a good harvest.
Chapter 3: Soil Preparation For Cantaloupe Plant
7 Steps To Prepare Soil For Cantaloupe Tree
Here are seven steps to prepare the soil for growing cantaloupe:
Step 1: Select the Right Location
Choose a sunny location in your garden that receives at least 6-8 hours of direct sunlight each day. Adequate sunlight is essential for cantaloupe growth and fruit development.
Step 2: Clear the Area
Remove any existing weeds, rocks, or debris from the chosen planting area. Weeds can compete with cantaloupe plants for nutrients and water, so it’s important to start with a clean space.
Step 3: Soil Testing
Conduct a soil test to determine the pH level and nutrient content of your soil. This will help you make informed decisions about soil amendments.
Step 4: Loosen the Soil
Use a garden fork or tiller to loosen the soil to a depth of about 12 inches (30 cm). This helps improve soil aeration and root penetration. Break up any compacted soil to create a loose, friable texture.
Step 5: Amend the Soil
Based on the results of your soil test, add organic matter such as compost or well-rotted manure to the soil. Mix it thoroughly to enhance fertility and improve soil structure.
Step 6: Adjust pH if Necessary
If your soil test indicates that the pH is outside the optimal range of 6.0 to 6.8, adjust it as needed. Add lime to raise pH or sulfur to lower it, following the recommended application rates.
Step 7: Create Mounds or Raised Beds
Cantaloupes benefit from well-drained soil, so consider creating mounds or raised beds to further improve drainage. Form raised rows or mounds about 8-12 inches (20-30 cm) high and 3-4 feet (0.9-1.2 meters) wide. Space the mounds or beds about 4-6 feet (1.2-1.8 meters) apart to allow for cantaloupe vine spread.
After completing these steps, your soil should be well-prepared for planting cantaloupe. Ensure that the soil is adequately warmed before sowing seeds or transplanting seedlings, as cantaloupes thrive in warm conditions. Proper soil preparation is essential for healthy cantaloupe plants and a successful harvest.
Chapter 4: How To Plant Cantaloupe
7 Steps To Plant Cantaloupe
Cantaloupes are typically grown as vines rather than trees.
However, I can provide you with seven steps to plant cantaloupe in your garden:
Step 1: Select a Suitable Location:
Choose a sunny location in your garden that receives at least 6-8 hours of direct sunlight per day. Adequate sunlight is essential for the growth and fruiting of cantaloupe plants.
Step 2: Prepare the Soil:
Prepare the soil as described in the previous response by clearing the area, conducting a soil test, amending the soil with organic matter, and adjusting the pH if necessary. Ensure that the soil is well-draining and fertile.
Step 3: Create Mounds or Rows:
Form raised rows or mounds in the prepared soil. These mounds should be about 8-12 inches (20-30 cm) high and 3-4 feet (0.9-1.2 meters) wide. Space the mounds or rows about 4-6 feet (1.2-1.8 meters) apart to allow for proper vine spread.
Step 4: Sow Seeds or Transplant Seedlings:
You can start cantaloupes from seeds indoors or directly in the garden. If starting indoors, plant seeds in biodegradable pots or seedling trays about 3-4 weeks before the last expected frost date. Transplant seedlings into the mounds or rows when they have at least two true leaves and all danger of frost has passed.
Step 5: Planting Depth:
Plant cantaloupe seeds or seedlings about 1 inch (2.5 cm) deep in the center of each mound or row. If planting multiple seeds, space them about 18-24 inches (45-60 cm) apart. If transplanting seedlings, space them according to the recommended spacing for the variety you’re growing.
Step 6: Watering:
After planting, water the soil thoroughly to settle it around the seeds or seedlings. Maintain consistent moisture throughout the growing season, ensuring that the soil remains evenly moist but not waterlogged.
Step 7: Mulch and Support:
Put down a layer of natural mulch like straw or compost around the cantaloupe plants. Mulch assists in moisture retention, weed control, and soil temperature balance. You could offer support for the growing cantaloupes by setting them on a spotless, dry platform such as cardboard or straw to avoid soil contact.
As your cantaloupe plants develop, you’ll notice they start to create tendrils. You can direct these towards supports or trellises. This saves space and keeps your fruit up off the soil. Remember to consistently check up on your cantaloupe. They need enough water, necessary fertilizers, and protection from harmful insects and diseases. If you manage to take proper care of them, you’re in for a generous reward of tasty, succulent cantaloupes.
Chapter 5: How To Care Cantaloupe Plant
5 Common Care Practices For Cantaloupe Plants
Here are 5 common and important care practices for cantaloupe plants:
1. Regular Watering
Cantaloupes require regular hydration for producing tasty, succulent fruit. Ensure the soil is continuously damp, particularly when flowers bloom and fruits form. Administer water on the plant’s lower part to prevent the leaves from getting damp, which could cause fungal illnesses. Utilizing drip watering or a soaker tube can be beneficial for ensuring steady ground hydration.
2. Fertilization
Give your cantaloupe plants what they need with the right fertilizer. Use a balanced one or a kind made just for fruit plants. Stick to the maker’s suggestions for how much and when to use it. Add more fertilizer when the vines start to stretch out and when the flowers show up.
3. Pruning and Thinning
To encourage healthy growth and better fruit production, consider pruning and thinning your cantaloupe plants:
Pruning: Remove excess foliage and side shoots to improve air circulation and reduce the risk of disease. Focus on removing leaves that shade developing fruit.
Thinning: When multiple cantaloupes develop on the same vine, consider thinning them to allow the remaining fruit to grow larger. Leave the healthiest and most well-formed fruit on each vine.
4. Pest and Disease Management
Stay alert for usual nuisances like aphids, beetles that target cucumbers, and spider mites. Look out for disease symptoms, like powdery or downy mildew. Apply organic or chemical solutions if needed, this is critical to guard your plants. Always check beneath leaves, that’s where pests love to hide.
5. Support and Trellising
Cantaloupe plants, during their growth phase, can get burdened by the weight of the fruit. This can lead to the fruit touching the soil, which raises the threat of decay and harm from pests. Ponder on giving a lift or using a trellis for the plants. This way, you can keep the fruit away from the ground. Old pantyhose or gentle fabric can work as slings. You can use them to hold the growing cantaloupes, stopping any premature breakage from the plant.
Maintaining your cantaloupe crops helps them flourish. It also ensures they yield lots of good fruit. This lessens the chance of problems that might hurt their growth. Paying attention to watering, giving nutrients, and controlling pests/diseases is vital for a great cantaloupe yield.
Chapter 6: Common Disease Cantaloupe Tree
6 common Disease And Treat Cantaloupe Tree
Cantaloupe plants may get a few diseases, but usual care and right timing can check and avoid most of them. Let’s count six ordinary diseases in cantaloupe plants, and methods to handle them:
1. Powdery Mildew
Symptoms: White, powdery spots or patches on the leaves, which can inhibit photosynthesis and reduce fruit production.
Treatment: Apply a fungicidal spray specifically designed to combat powdery mildew. Alternatively, use homemade remedies like a mixture of water and baking soda (1 tablespoon of baking soda per gallon of water) as a preventative spray. Ensure good air circulation around plants by proper spacing and pruning.
2. Downy Mildew
Symptoms: Yellow or brown spots on the upper leaf surface, and fuzzy, grayish growth on the undersides of leaves.
Treatment: Apply fungicides labeled for downy mildew control as soon as symptoms appear. Use copper-based fungicides or those containing chlorothalonil. Maintain proper spacing between plants to enhance airflow.
3. Fusarium Wilt
Symptoms: Wilting, yellowing, and eventual death of leaves, starting with the older leaves. Vascular tissue may show discoloration.
Treatment: Fusarium wilt is challenging to treat once plants are infected. The best approach is prevention. Plant disease-resistant cantaloupe varieties, practice crop rotation, and avoid planting in soil with a history of Fusarium issues.
4. Anthracnose
Symptoms: Circular, sunken lesions with dark borders on fruit, which can lead to fruit rot. Leaves may also exhibit irregular spots.
Treatment: Apply fungicides labeled for anthracnose control before symptoms appear or at the first sign of infection. Maintain good hygiene by removing and destroying infected plant material.
5. Bacterial Wilt
Symptoms: Wilting of the entire plant, often starting with a single runner or vine. Cut stems may ooze a slimy, white substance when squeezed.
Treatment: There are no effective treatments for bacterial wilt once plants are infected. To prevent it, use disease-resistant cantaloupe varieties and avoid planting in soil with a history of bacterial wilt.
6. Aphids and Cucumber Beetles (Vectors for Diseases)
Symptoms: These pests don’t cause diseases directly but can transmit diseases like cucumber mosaic virus. Aphids are tiny insects, while cucumber beetles are small, yellow or striped beetles.
Treatment: Control aphids and cucumber beetles with insecticidal soap or neem oil. Remove and destroy infected plants to reduce the spread of disease.
Aside from healing, we must also stop cantaloupe diseases before they start. Try to pick types of cantaloupe that resist diseases. Switch where you plant things, keep the garden neat, and make sure your plants aren’t too close together. Always check your plants for the first signs of sickness; it’s usually easier to stop diseases early on.
Chapter 7: Common Pest Cantaloupe Tree
6 Common Pests and treat Cantaloupe Tree
Cantaloupe plants can be vulnerable to various pests that can harm both the foliage and the fruit.
Here are 6 common pests that affect cantaloupe plants and how to treat and prevent them:
1. Aphids
Symptoms: Tiny, soft-bodied insects that cluster on the undersides of leaves, causing leaf distortion, yellowing, and reduced plant vigor.
Treatment: Spray affected plants with a strong stream of water to dislodge aphids. Use insecticidal soap, neem oil, or horticultural oil to control severe infestations. Encourage natural predators like ladybugs and lacewings.
2. Cucumber Beetles
Symptoms: Small, yellow or striped beetles that feed on leaves, flowers, and fruit. They can transmit diseases like bacterial wilt and cucumber mosaic virus.
Treatment: Handpick beetles from plants in the early morning when they are sluggish. Use row covers to protect young plants. Apply neem oil or pyrethrin-based insecticides as a last resort.
3. Spider Mites
Symptoms: Tiny, reddish-brown pests that cause stippling on leaves, turning them yellow and reducing plant vigor.
Treatment: Spray plants with a strong stream of water to dislodge spider mites. Use neem oil or insecticidal soap to control severe infestations. Ensure proper humidity and avoid over-fertilization, which can attract mites.
4. Whiteflies
Symptoms: Tiny, white insects that congregate on the undersides of leaves, causing yellowing and curling of leaves and the transmission of diseases.
Treatment: Introduce natural predators like parasitic wasps. Use yellow sticky traps to monitor and reduce adult whitefly populations. Apply neem oil or insecticidal soap to control severe infestations.
5. Squash Bugs
Symptoms: Large, brown or black bugs that feed on leaves, stems, and fruit. They can cause wilting and reduced fruit quality.
Treatment: Handpick and destroy squash bugs and their egg clusters. Apply diatomaceous earth or use insecticidal soap on nymphs. Practice crop rotation to reduce overwintering populations.
6. Cutworms
Symptoms: Larvae of moths that cut through stems at ground level, causing plants to wilt and die.
Treatment: Use collar barriers, such as cardboard or plastic rings, around the base of seedlings to protect them from cutworms. Handpick and remove cutworms during evening inspections.
In line with the added care methods, ensure you maintain a clean garden. This means get rid of left-over crop bits and pull out weeds as they help to keep bugs away. Always check your cantaloupe plants for pests. If you spot any, act quickly to keep any harm to a minimum. Planting your cantaloupes with herbs and flowers that pests don’t like can also help to deter them.
Chapter 8: How To Harvest & Store Cantaloupe Tree
How To Harvest & Store Cantaloupe Tree
Cantaloupes, often grown on vines not trees, need the right harvesting and storage for their tasty, juicy taste. Here’s your guide to pick and save cantaloupes:
Harvesting Cantaloupes:
- Look for Maturity: Prior to picking, examine the cantaloupes’ maturity. A mature cantaloupe will emit a pleasing scent at the bloom end (not the stem side). The exterior should switch from green to a pale or somewhat yellow shade, and it should feel a bit soft when lightly touched. The melon should naturally separate from the vine.
- Use Cutting Tools: Picking cantaloupes, take spotless pruning shears or a keen knife. Slice the cantaloupe off the vine, keep a tiny stem (around 1-2 inches). Don’t yank or wrench the cantaloupe; this can hurt the plant.
- Be Gentle: Be careful when picking cantaloupes to avoid hurting them. Put them in a flat basket or box with something soft lining the bottom. This keeps them safe when moving.
Storing Cantaloupes:
- Cantaloupe Storage Tips: If your cantaloupes aren’t quite ripe after harvesting, no worries! Just leave them out at room temperature for several days. This will help them ripen up nicely. But remember, keep these juicy melons in a cool spot, far from sunlight.
- Chilling: For extended preservation, shift mature cantaloupes into the fridge. Have them situated in the crisper area, which has a bit cooler temperature and tracks slightly higher moisture than other fridge compartments.
- Keep it Whole or Sliced: Whole cantaloupes and their sliced parts can both be stored. For cut cantaloupe, store them in plastic wrap or a sealed container to stop them from drying out. This way they stay fresh.
- Eat Quickly: Cantaloupes taste top-notch if eaten within a week of being picked, no matter if they hang out on the counter or chill in the fridge. Quick consumption makes them yummier and keeps their texture satisfying.
Tips for Keeping Cantaloupes Fresh:
- Avoid washing cantaloupes before storing, as moisture can promote spoilage. Rinse and scrub the fruit just before consuming.
- Keep cantaloupes away from strong-smelling foods in the refrigerator, as they can absorb odors.
- If you’ve cut a cantaloupe and have leftovers, cover the cut surface with plastic wrap, pressing it directly against the fruit to minimize exposure to air.
Cantaloupes are at their peak of flavor and sweetness when enjoyed fresh. Proper harvesting and storage techniques will help you savor the delicious taste of homegrown cantaloupes for as long as possible.