
Dreaming of growing juicy boysenberries? Wondering how to start? This guide reveals secrets for successful boysenberry planting, from choosing the right spot to nurturing your patch. Learn the steps for a thriving harvest and turn your garden into a berry haven. Get ready to enjoy the sweet rewards of your efforts!
[ez-toc]
CHAPTER 1: Planting Basics of Boysenberries
How long does it take for boysenberries to grow?
Boysenberries typically take about two years to reach maturity and produce fruit. After planting, the first year is dedicated to establishing the plant’s roots and structure. During the second year, you can expect the boysenberry plant to start bearing fruit. Patience is key during the initial stages, but the delicious harvest makes the wait worthwhile.
Are boysenberries hard to grow?
No, boysenberries are generally not hard to grow. They are adaptable and thrive in various soil types, making them suitable for home gardens. Boysenberry plants require well-drained soil, full sunlight, and a trellis for support. Regular pruning helps maintain their vigor and makes the harvesting process more accessible. With proper care and attention to their basic needs, even novice gardeners can enjoy a successful boysenberry harvest.
CHAPTER 2: Varieties of Boysenberries
6 Best Varieties of Boysenberries
Boysenberries offer a delightful range of flavors and characteristics. Here are six standout varieties of Boysenberries to consider:
1. Boysen Supreme:
Boysen Supreme is prized for its large, sweet berries with a perfect balance of tartness. This variety is known for its disease resistance and vigorous growth, making it a favorite among home gardeners.
2. Navajo Boysenberry:
With a compact growth habit, Navajo Boysenberry is an excellent choice for smaller spaces. The berries are juicy and sweet, and the plant is known for its high productivity.
3. Ouachita Boysenberry:
Ouachita is recognized for its exceptional flavor profile, combining sweetness and a hint of acidity. The berries are firm and large, making them ideal for various culinary uses.
4. Triple Crown Boysenberry:
Triple Crown stands out for its thornless canes, making harvesting easier. The berries are large, sweet, and perfect for fresh consumption or making jams and desserts.
5. Natchez Boysenberry:
Natchez is celebrated for its early harvest and large, glossy berries. The flavor is sweet and slightly tangy, making it a versatile choice for both fresh eating and processing.
6. Kiowa Boysenberry:
Kiowa is known for its impressive size and sweet flavor. The plant is vigorous and produces an abundance of berries, making it a favorite for home gardeners seeking a bountiful harvest.
Each of these boysenberry varieties offers a unique combination of taste, size, and growth habits, allowing you to choose the perfect fit for your garden and culinary preferences.
CHAPTER 3: How to Plant Boysenberries
How to Plant Boysenberries – 10 Easy Steps
Planting boysenberries is a rewarding endeavor that can be accomplished with these straightforward steps:
Choose the Right Location:
- Select a sunny spot with well-drained soil for optimal growth. Boysenberries thrive in full sunlight.
Prepare the Soil:
- Ensure the soil is rich in organic matter and well-drained. Boysenberries prefer slightly acidic to neutral soil.
Test the Soil pH:
- Test the soil pH and adjust it to the recommended range of 5.5 to 6.5 for ideal boysenberry growth.
Planting Time:
- Plant boysenberries in late fall or early spring when the soil is workable. Avoid planting during extreme weather conditions.
Spacing Matters:
- Space the plants 4 to 6 feet apart in rows, and ensure the rows are 8 to 10 feet apart for proper air circulation.
Digging Holes:
- Dig holes deep enough to accommodate the roots comfortably. Place the boysenberry plant in the hole, covering the roots with soil.
Provide Support:
- Boysenberries benefit from a trellis or support system. Install it at the time of planting to avoid disturbing the roots later.
Watering Routine:
- Maintain consistent moisture, especially during the growing season. Boysenberries need about 1 to 1.5 inches of water per week.
Mulch for Moisture and Weed Control:
- Apply a layer of mulch around the plants to retain moisture, suppress weeds, and regulate soil temperature.
Pruning for Productivity:
- Prune boysenberries regularly to encourage airflow, remove dead canes, and promote the growth of new, fruit-bearing canes.
By following these ten simple steps, you can establish a healthy and productive boysenberry patch in your garden. With proper care and attention, your boysenberry plants will reward you with a bountiful harvest of delicious berries.
CHAPTER 4: How to Care for Boysenberries
Caring for boysenberries involves a combination of proper maintenance, attention to detail, and strategic practices to ensure a healthy and fruitful harvest. Follow these step-by-step guidelines:
Step 1: Pruning
Begin pruning boysenberries during the dormant season (late winter to early spring). Remove dead or damaged canes and thin out crowded growth to enhance airflow and sunlight penetration.
Step 2: Trellis Maintenance
Check the trellis system regularly to provide proper support for growing canes. Secure any loose or leaning canes to maintain an upright and well-organized structure.
Step 3: Watering
Establish a consistent watering routine, especially during dry periods. Boysenberries prefer deep, infrequent watering over shallow, frequent irrigation. Aim for about 1 to 1.5 inches of water per week.
Step 4: Fertilization
Apply a balanced fertilizer in early spring as new growth emerges. Follow recommended dosage based on soil test results. Avoid excessive nitrogen, as it can lead to excessive foliage growth at the expense of fruit production.
Step 5: Mulching
Maintain a layer of organic mulch around the base of the plants to conserve moisture, suppress weeds, and regulate soil temperature. Keep the mulch away from the crown to prevent rot.
Step 6: Pest and Disease Control
Regularly inspect plants for signs of pests and diseases. Treat infestations promptly using organic or chemical solutions as needed. Neem oil can be effective against common pests, while copper fungicides may help control fungal diseases.
Step 7: Netting for Birds
Protect your boysenberry crop from birds by installing bird netting. This prevents birds from feasting on your berries before you have a chance to harvest them.
Step 8: Harvesting
Harvest boysenberries when they are fully ripe, plump, and easily detach from the plant. Pick berries in the morning when they are cool and at their peak flavor. Be gentle to avoid damaging the delicate fruit.
Step 9: Post-Harvest Care
Remove any remaining fruit after harvesting to prevent the spread of diseases. Prune out old canes to make way for new growth. Continue regular care to prepare the plants for the next growing season.
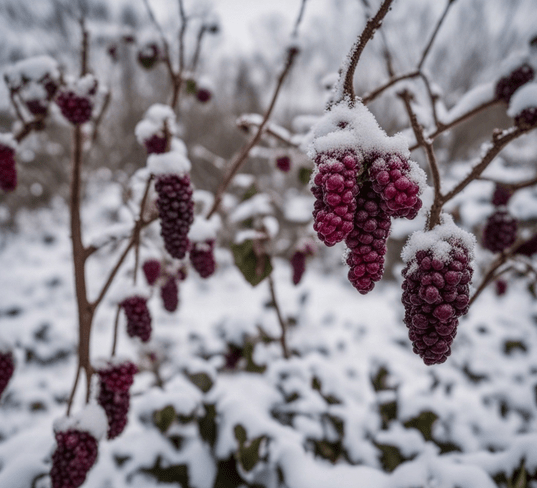
Step 10: Winter Protection
In colder climates, provide winter protection by mulching around the base of the plants. This helps insulate the roots and protects them from extreme temperature fluctuations.
By following these step-by-step guidelines, you’ll ensure that your boysenberry plants remain healthy, productive, and a consistent source of delicious berries season after season.
CHAPTER 5: How to Prune Boysenberries
Pruning boysenberries is essential for maintaining plant health, promoting vigorous growth, and ensuring a bountiful harvest. Follow these easy steps for effective boysenberry pruning:
Step 1: Timing
Prune boysenberries during the dormant season, typically in late winter or early spring before new growth begins. This allows the plant to direct energy to the remaining canes and encourages the development of strong, fruitful branches.
Step 2: Remove Dead or Diseased Canes
Identify and remove any dead, damaged, or diseased canes. Cut them back to ground level using sharp pruning shears. This helps prevent the spread of diseases and opens up space for healthy growth.
Step 3: Thin Out Canes
Thin out the remaining canes to improve airflow and sunlight penetration. Select the strongest, most vigorous canes and remove the weaker ones. Aim for a well-spaced and organized arrangement.
Step 4: Cut at Ground Level
For removed canes, make clean cuts at ground level. Dispose of the pruned material away from the boysenberry plants to reduce the risk of disease transmission.
Step 5: Prune Lateral Branches
Trim lateral branches to encourage a bushier growth habit. Cut back lateral branches to about 12 to 18 inches in length, promoting the development of fruiting spurs.
Step 6: Manage Height
Control the height of boysenberry plants by pruning the tops of canes. This helps maintain an accessible and manageable plant structure for easier harvesting.
Step 7: Use Pruning Shears
Always use sharp, clean pruning shears to make precise cuts. This minimizes stress on the plant and reduces the risk of introducing infections. Disinfect the pruning shears between cuts, especially when moving between plants.
Step 8: Trellis Maintenance
If boysenberries are grown on a trellis system, ensure that the canes are properly secured. Train new canes onto the trellis to promote an organized and efficient growing space.
Step 9: Remove Weak Growth
Identify and remove any weak, spindly growth. Focus on maintaining robust canes that will contribute to a productive harvest.
Step 10: Dispose of Pruned Material
Dispose of pruned material away from the garden area to prevent the potential spread of diseases. Consider composting healthy plant material if disease-free.
Pruning boysenberries is a straightforward process that, when done correctly, enhances plant vitality and improves fruit production. Regular pruning ensures a healthier and more productive boysenberry patch in your garden.
CHAPTER 6: Common Diseases of Boysenberries
Boysenberries, like any other plant, are susceptible to various diseases that can impact their growth and fruit production. Here are five common diseases that may affect boysenberries:
1. Powdery Mildew (Podosphaera spp.):
Powdery mildew appears as a white powdery substance on leaves, stems, and fruit. It thrives in dry conditions with high humidity. To control powdery mildew, ensure proper spacing for air circulation, and apply fungicides as a preventive measure during the growing season.
2. Gray Mold (Botrytis cinerea):
Gray mold affects ripe and overripe berries, causing a fuzzy gray growth. This fungus thrives in cool, damp conditions. Prune plants to improve airflow, harvest fruit promptly, and apply fungicides as needed to prevent or control gray mold.
3. Anthracnose (Colletotrichum spp.):
Anthracnose causes dark, sunken lesions on berries and canes. It thrives in warm and wet conditions. Remove and destroy infected plant material, ensure proper spacing, and apply fungicides to manage anthracnose effectively.
4. Cane and Leaf Rust (Kuehneola uredinis):
Cane and leaf rust manifest as orange or rust-colored spots on leaves and canes. Improve overall plant health through proper pruning and spacing. Fungicides may be applied preventively, especially during wet seasons, to mitigate the impact of cane and leaf rust.
5. Verticillium Wilt (Verticillium spp.):
Verticillium wilt causes wilting and yellowing of leaves due to a soil-borne fungus. Infected plants may exhibit stunted growth. Practice crop rotation, choose resistant varieties, and ensure well-drained soil to manage verticillium wilt. Fungicide applications are generally not effective against this disease.
Understanding and promptly addressing these common diseases is crucial to maintaining the health and productivity of boysenberry plants. Regular monitoring, proper cultural practices, and timely intervention contribute to effective disease management in your boysenberry patch.
CHAPTER 7: Common Pests of Boysenberries
Boysenberries, like many fruit-bearing plants, can fall victim to various pests that pose threats to their overall health and productivity. Here are five common pests that may affect boysenberries:
1. Spider Mites (Tetranychidae family):
Spider mites are tiny arachnids that suck the sap from boysenberry leaves, causing stippling and discoloration. These pests thrive in hot, dry conditions. Introduce natural predators like ladybugs, and periodically spray the plants with water to reduce mite populations. In severe cases, insecticidal soap or neem oil can be used.
2. Aphids (Aphidoidea superfamily):
Aphids are small, soft-bodied insects that cluster on new growth, extracting plant sap and secreting honeydew. To control aphids, introduce beneficial insects like ladybugs or lacewings. Prune infested areas, and use insecticidal soap or neem oil as a natural remedy.
3. Spotted Wing Drosophila (Drosophila suzukii):
Spotted wing drosophila are fruit flies that lay eggs in ripening boysenberries. Larvae feed inside the fruit, causing damage. Use fine-mesh netting to protect berries, harvest promptly, and consider natural predators like parasitoid wasps for biological control.
4. Cutworms (Noctuidae family):
Cutworms are nocturnal caterpillars that feed on young boysenberry plants, cutting through stems at ground level. Apply physical barriers like collars around young plants, introduce beneficial nematodes, and keep the garden free of debris to reduce cutworm populations.
5. Japanese Beetles (Popillia japonica):
Japanese beetles feed on boysenberry leaves, creating skeletonized patterns. Handpick beetles in the morning when they are sluggish, use neem oil or insecticidal soap, and consider planting repellent plants like garlic or chives nearby.
Regular monitoring and early intervention are key to managing these common pests effectively. Employing a combination of cultural practices, natural predators, and, when necessary, targeted treatments will help keep your boysenberry plants healthy and pest-free.
CHAPTER 8: How to Harvest and Store Boysenberries
Harvesting boysenberries at the peak of ripeness ensures the best flavor and quality. Follow these steps for a successful harvest and proper storage:
Harvesting Boysenberries
Timing is Crucial:
- Harvest boysenberries when they are fully ripe. The berries should be plump, dark in color, and easily detach from the plant. Pick in the morning when they are cool and flavorful.
Gentle Handling:
- Handle boysenberries gently to avoid bruising and damage. Use a small, sharp pair of scissors or pruning shears to cut the berries from the plant, leaving the stem attached.
Frequent Harvests:
- Harvest boysenberries frequently during the peak season. This encourages continuous fruiting and prevents over-ripening or fruit loss.
Inspect for Ripeness:
- Inspect each berry for ripeness before harvesting. Berries that are not fully ripe will not continue to ripen after being picked.
Storing Boysenberries
Immediate Refrigeration:
- Place harvested boysenberries in the refrigerator immediately after picking. Refrigeration slows down the ripening process and preserves freshness.
Avoid Washing Until Use:
- Avoid washing boysenberries until you are ready to use them. Moisture can promote mold growth, so keep them dry during storage.
Use Ventilated Containers:
- Store boysenberries in ventilated containers or perforated plastic bags to maintain airflow and reduce condensation.
Short-Term Freezing:
- If you have more boysenberries than you can use in the short term, consider freezing them. Lay the berries in a single layer on a tray, freeze, and then transfer them to a sealed bag or container.
Dry-Pack Canning:
- Another storage option is dry-pack canning. Fill clean, dry jars with boysenberries, leaving headspace, and seal with a sterile lid. Store in a cool, dark place.
Consume Promptly:
- Boysenberries have a relatively short shelf life. Consume them promptly for the best taste and texture.
Preserving:
- Explore preserving options like making boysenberry jam or jelly to extend the shelf life and enjoy the flavor year-round.
By following these harvesting and storage guidelines, you can savor the delicious taste of boysenberries well beyond the harvest season. Whether enjoyed fresh, frozen, or preserved, proper handling ensures the best quality for your boysenberry harvest
Conclusion
cultivating and caring for boysenberries is a rewarding journey, from planting to harvest. The guide has unveiled the secrets to successful cultivation, providing insights into choosing varieties, planting techniques, care practices, and overcoming common challenges. Whether you’re a novice or experienced gardener, the rich variety of boysenberry options and the detailed care instructions ensure a fruitful harvest. Transform your garden into a berry haven, and relish the sweet rewards of your efforts—delicious boysenberries, enjoyed fresh, frozen, or preserved throughout the year. Happy gardening and indulging in nature’s sweet bounty!