Skip to content
Ever wondered how to cultivate plump, juicy blackberries right in your backyard? The journey from berry dreams to bountiful harvests begins with the right planting techniques. In this guide, we’ll unravel the secrets of successful blackberry cultivation, guiding you through each step with precision. From selecting the perfect spot to nurturing your berries to fruition, this blog post is your key to a thriving blackberry garden. Get ready to savor the sweetness of homegrown success – your ultimate guide to planting blackberries awaits! Simplify this content now
[ez-toc]
Chapter 1: Planting Basic of Cherry Tree
Are Blackberries Hard To Grow?
Growing blackberries? Not too tough. Planting blackberries can be an enjoyable task. It requires just a little focus on several key things. The most important one? Picking the right type of blackberry. They need plenty of sunshine, soil that drains water well, and the correct pH level. It’s also crucial to prune them regularly. This helps them grow strong and healthy. Also, keep an eye out for pests and diseases. Being attentive to these things, you can expect a tasty and ample harvest from your garden.
How To Choose the Right Blackberrys Variety?
Selecting the best blackberry variety for your garden is crucial. It impacts the success of your harvest. Blackberries differ in taste, size, growth patterns, and ability to withstand weather and disease. They also fruit at different times.
Here’s your guide to choosing the right blackberry for your needs:
Consider Your Local Climate:
- Take into account your region’s climate and weather conditions. Some blackberry varieties thrive in warmer climates, while others are more suited for cooler areas.
- Ensure that the blackberry variety you choose can withstand the temperature fluctuations and humidity levels in your region.
Purpose of Growing Blackberries:
- Determine your primary reason for growing blackberries. Are you looking for fresh, sweet berries to enjoy straight from the bush, or do you plan to use them for cooking, baking, jams, or preserves?
- Different blackberry varieties have varying levels of sweetness and flavor profiles, so choose one that aligns with your culinary preferences.
Size and Space:
- Evaluate the available space in your garden or berry patch. Some blackberry varieties have a more compact growth habit and are suitable for smaller areas, while others can spread more extensively.
- Consider the vertical growth of trailing blackberry varieties and their need for proper support.
Growth Habit:
- Blackberries come in two primary growth habits: trailing and erect.
- Trailing blackberry varieties spread along the ground and may require more space, while erect varieties have a more upright growth habit and are suitable for smaller spaces or trellises.
Ripening Time:
- To extend your blackberry harvest season, select a mix of early, mid-season, and late-ripening varieties.
- This ensures a continuous supply of fresh blackberries throughout the growing season.
Disease Resistance:
- Check the disease resistance of the blackberry variety you’re considering. Some varieties are more resistant to common pests and diseases, which can reduce the need for chemical treatments.
Flavor Preferences:
- Taste is subjective, so choose blackberry varieties that align with your flavor preferences. Some may be sweeter, more tart, or have unique flavor profiles, so select based on your taste.
Thorniness:
- Decide whether you prefer thornless or thorny blackberry varieties. Thornless blackberries are easier to harvest, but some gardeners prefer the character of thorny varieties.
Local Recommendations:
- Seek advice from local gardening experts, nurseries, or agricultural extension services. They can provide valuable insights into the best blackberry varieties for your specific region and growing conditions.
By considering these factors, you can make an informed decision and choose the ideal blackberry variety that suits your location, preferences, and intended culinary uses. This will lead to a successful and enjoyable blackberry harvest.
How Long Does It Take For Blackberries To Grow?
Blackberry bushes generally need 2 years to give fruit after being planted.
Let’s check out a simple outline of their growth and when they give fruit:
First Year (Year of Planting)
- Getting Started: In year one, begin by placing blackberry stalks in the ground during early spring. Generally, these stalks aren’t active, they’re bare at the root.
- Progress: In the initial growth period, the blackberry plants work on creating their roots and developing canes. New canes will start popping up from the soil.
- No Fruit: Blackberry plants do not typically produce fruit in their first year. It’s essential to be patient and allow the plants to develop.
Second Year (Year After Planting)
- Flowering: During year two, the sticks that sprouted in year one will form blossoms in the later part of spring into the start of summer.
- Post-Blossom Stage: Once the blossoms end, berries emerge. They begin to take shape and increase in size during the hot season.
- Harvest: Your first blackberry yield should be ready in year two. When exactly? That’s up to the type of berry and your location’s weather. Mostly, it’s late spring or start of summer.
Subsequent Years
- Higher Harvest: When the blackberry bushes grow older, they will have more stems. Each year, more blackberries will grow on these stems.
- Maintenance: Proper pruning and care are essential to maintain healthy and productive blackberry plants.
Note that various blackberry types can present changes in how they grow and bear fruit. Also, your local weather and environment can affect when they produce fruit. In the first year, you might not see a lot of berries, but the effort and patience you give to your blackberry plants will give back with lots of fruits in the coming years.
Chapter 2: Space For Blackberry Trees
Why Spacing Matters for Blackberry Plants?
Right distance between blackberry bushes is very important for a few reasons:
- Sunlight Access: Just like tomatoes, blackberry bushes need lots of light to grow well and make a lot of fruit. Proper space between each bush makes sure all plants get enough sun for making food and growing fruit.
- Air Flow: Blackberry canes need room to breathe. More space equals more air movement. More air cuts down the chances of harmful bugs and mold. Ever heard of powdery mildew or spider mites? These baddies love tight spaces. Don’t give them a chance to settle in.
- Root Area: Blackberry bushes need lots of space for roots. Giving enough room helps roots stretch, find food, and draw in water without battling other plants.
- Ease of Maintenance: Just the right amount of space can make looking after blackberry plants a less complicated job. Moving between rows and single stems becomes smoother. This helps with jobs like cutting back, pulling weeds, and picking fruit.
How Much Space Does A Blackberry Plant Need?
The rules for spacing blackberries can change based on the type, but here are some basic rules:
- Between Plants: Place separate blackberry stems or seedlings roughly 3 to 4 feet away from each other in lines. This gap lets every plant get the space it needs to expand and soak up enough sun.
- Between Rows: Ensure a space of roughly 8 to 10 feet between rows. This gives plenty of room for upkeep tasks and avoids over-packing.
- Support Aid: Thinking about using a trellis or another help structure for your blackberry bushes? Remember to place them correctly to help the stalks and fruit.
To sum up, for blackberry plants to grow healthily, the right space is key. This gives them needed sunlight, fosters airflow, offers enough room for roots, and makes upkeep easier. Stick to these spacing rules to boost your blackberry harvest outcomes.
What Is The Best Area To Plant Blackberries?
- Full Sun: Blackberries thrive in full sunlight, so choose a location that receives at least 6 to 8 hours of direct sunlight per day. More sunlight usually results in better fruit production.
- Well-Drained Soil: Ensure the soil has good drainage to prevent waterlogged roots, which can harm blackberry plants.
- Adequate Air Circulation: Good air circulation helps reduce the risk of disease, so avoid planting blackberries in areas with heavy, stagnant air or where they might be crowded by other plants.
What Not to Plant Near Blackberries?
- Other Invasive Plants: Avoid planting blackberries near invasive plants or aggressive weeds that could compete for nutrients and space.
- Plants Susceptible to the Same Diseases: Some plants are susceptible to the same diseases as blackberries, such as raspberries, strawberries, or blueberries. Some other plants like:- Tomatoes, Potatoes, Peppers, Eggplant, Mint, Beans. It’s best to separate these plants to prevent disease transmission.
- Plants with Similar Growing Requirements: While it’s essential to provide adequate spacing for blackberries, avoid planting them too close to other large shrubs or trees that might shade them or compete for resources.
In summary, blackberry plants need space for proper growth, full sun for optimal fruit production, and well-drained soil. Be mindful of what you plant nearby to ensure your blackberries thrive and stay healthy.
Chapter 3: Varieties & Season
5 Best Blackberry Varieties To Plant
Here are five of the best blackberry varieties, along with a brief description and reasons to choose them:
1. Triple Crown:
- Description: Triple Crown blackberries are known for their large, sweet, and juicy berries. They have a rich, sweet flavor with a hint of tartness.
- Why Choose: Choose Triple Crown for its excellent berry size and flavor. It’s a thornless variety, making harvesting easier, and it produces abundant fruit.
2. Marionberry:
- Description: Marionberries are a type of blackberry known for their exceptional flavor. They are dark purple-black in color and have a sweet-tart taste.
- Why Choose: Marionberries are favored for their unique and delicious flavor, making them ideal for fresh eating, pies, and jams.
3. Navajo:
- Description: Navajo blackberries have sweet and slightly tangy berries. They are firm and glossy black in color.
- Why Choose: Opt for Navajo for its thornless canes, easy harvesting, and consistent fruit production. They thrive in various climates.
4. Ouachita:
- Description: Ouachita blackberries produce large, firm berries with a sweet and tangy flavor. They are dark black in color.
- Why Choose: Ouachita is known for its disease resistance and adaptability to different growing conditions, making it a reliable choice.
5. Chester:
- Description: Chester blackberries are thornless and produce sweet, juicy berries. They are typically large and dark in color.
- Why Choose: Chester is a late-season producer, extending the blackberry harvest into late summer. Its thornless canes make maintenance and harvesting hassle-free.
These blackberry varieties offer a range of flavors and characteristics, allowing you to choose the one that best suits your taste preferences and growing conditions.
What Is The Best Season To Grow Blackberries?
The best season to grow blackberries is typically late spring to early summer.
Why? Because the warm weather helps blackberry plants to settle in and grow robust roots prior to the season of bearing fruits. Timing can differ though, based on where you live and the climatic conditions there. So, the best move? Get advice from local garden pros or farm extension service about optimal planting periods in your locality.
Chapter 4: Soil Preparation For Cherry Trees
Why Soil Preparation is Important for Blackberry Plants?
Proper soil preparation is a critical step in establishing a thriving blackberry garden. Effective soil preparation not only influences the growth and health of your blackberry plants but also affects the quantity and quality of the berries they produce. Understanding the significance of soil preparation and following essential steps can significantly boost your success in cultivating delicious and abundant blackberries.
Importance of Soil Preparation
Nutrient Availability: Well-prepared soil ensures the availability of essential nutrients required for robust blackberry plant growth and fruitful berry production.
Root Development: Proper soil structure promotes healthy root development in blackberry plants. Strong and well-established roots are vital for efficient nutrient and water absorption.
Drainage and Aeration: Adequately prepared soil improves drainage and aeration, reducing the risk of waterlogged roots and diseases such as root rot, which can be detrimental to blackberry plants.
pH Balance: Blackberries thrive in slightly acidic to neutral soil with a pH range of around 5.5 to 7.0. Proper soil preparation helps maintain this pH balance, ensuring optimal nutrient absorption and plant health.
6 Essential Steps for Soil Preparation for Blackberry Plants
Step 1. Site Selection
- Choose a location with full sun exposure (at least 6-8 hours of direct sunlight) for your blackberry plants.
- Ensure the selected site has well-drained soil to prevent waterlogging.
Step 2. Soil Testing
- Conduct a soil test to determine the pH and nutrient content of your soil.
- Adjust the pH, if necessary, by adding lime to raise it or sulfur to lower it, aiming for the preferred range of 5.5 to 7.0.
Step 3. Clearing the Site
- Remove weeds, rocks, and debris from the planting area to reduce competition for nutrients and water.
Step 4. Tilling
- Till the soil to a depth of about 12-18 inches to improve aeration and drainage.
Step 5. Adding Organic Matter
- Incorporate compost or aged manure into the soil to enrich it with organic matter. This enhances soil texture and fertility, benefiting blackberry growth.
Step 6. Preparing Planting Holes
- Dig planting holes that are wide enough to accommodate the root system of your blackberry plants. Ensure they have ample room to grow.
Proper soil preparation is the foundation for cultivating healthy and productive blackberry plants. By dedicating time to prepare your soil, you can improve plant health, enhance disease resistance, and ultimately enjoy a plentiful harvest of delectable blackberries.
Chapter 5: How To Plant Cherry Trees
How To Plant Blackberries 7 Easy Steps
Planting blackberries is a rewarding endeavor that can yield delicious berries for years to come. Follow these seven easy steps to successfully plant blackberries:
1. Choose the Right Location:
- Select a planting site that receives full sun, which is essential for optimal blackberry growth and fruit production.
- Ensure the soil has good drainage to prevent waterlogged roots, as blackberries are susceptible to root rot in soggy conditions.
2. Prepare the Soil:
- Conduct a soil test to determine the pH and nutrient content of your soil.
- Adjust the pH if needed to be in the range of 5.5 to 7.0, which is ideal for blackberries.
- Incorporate organic matter like compost or aged manure into the soil to improve fertility and texture.
3. Choose the Right Variety:
- Select blackberry varieties that are well-suited to your climate and preferences. Common types include thornless and thorny varieties, which vary in flavor and berry size.
4. Planting Holes:
- Dig planting holes that are approximately 2 feet apart in rows, with rows spaced 6 to 8 feet apart. This spacing allows for good air circulation and easy access for maintenance.
- Make each hole large enough to accommodate the plant’s root system. Typically, a hole should be deep and wide enough to comfortably fit the roots without crowding or bending them.
5. Plant the Blackberries:
- Gently remove the blackberry plants from their containers or root balls.
- Place the plants in the prepared holes, ensuring they are at the same depth as they were in their original containers.
- Backfill the holes with soil and pat it down gently to eliminate air pockets.
6. Watering and Mulching:
- Water the newly planted blackberries thoroughly to settle the soil and ensure good root-to-soil contact.
- Apply a layer of organic mulch, such as straw or wood chips, around the base of the plants to help retain moisture, suppress weeds, and regulate soil temperature.
7. Provide Support:
- Install a trellis or support system for your blackberry plants, especially if you’re growing trailing or semi-erect varieties. This helps keep the canes off the ground and makes harvesting easier.
Additional Tips:
- Prune the blackberry canes back to about 4-5 inches after planting to encourage healthy growth.
- Ensure consistent watering, especially during dry spells, to keep the soil consistently moist but not waterlogged.
- Monitor for pests and diseases and take appropriate measures for control if needed.
With these seven steps and proper care, your blackberry plants will establish themselves and produce an abundance of sweet, juicy berries in the seasons to come.
Chapter 6: How To Care For Blackberries Trees
Post-Planting Care for Blackberry Plants
1. Watering:
Newly planted blackberry plants need regular and consistent watering to establish their root systems. Water deeply once or twice a week, ensuring the soil remains evenly moist but not waterlogged.
2. Mulching:
Apply a layer of organic mulch around the base of the blackberry plants, keeping it a few inches away from the stems. Mulch helps retain soil moisture, suppress weeds, and regulate soil temperature.
3. Supporting:
Install a trellis or support system to keep the blackberry canes upright and off the ground. This prevents fruit rot and makes harvesting easier.
4. Pruning:
Regularly prune your blackberry plants to remove any dead or diseased canes. Pruning encourages healthy growth and improves air circulation.
5. Protection:
Keep an eye out for pests and diseases that commonly affect blackberries. Monitor for issues like cane borers or fungal diseases and take appropriate measures for control.
Mature Blackberry Plant Care
1. Regular Pruning:
Continue to prune blackberry canes to remove any dead or diseased growth and to manage the plant’s size.
2. Pest and Disease Monitoring:
Be vigilant about pests and diseases and promptly address any issues to prevent them from spreading.
3. Fruit Harvesting:
Harvest ripe blackberries as they become ready. Frequent harvesting encourages the plant to produce more fruit.
4. Watering Adjustments:
Mature blackberry plants still need regular watering, especially during hot weather. Adjust the frequency based on weather conditions and soil moisture levels.
5. Soil Health and Fertilization:
Apply a balanced fertilizer suitable for berry plants every four to six weeks during the growing season to ensure they receive essential nutrients.
Watering and Moisture Management
- Young blackberry plants require consistent watering to establish their roots, while mature plants may need less frequent but deeper watering.
- Use a soil moisture meter or the finger test to determine when it’s time to water.
Fertilizing Your Blackberry Plant
- Select a balanced fertilizer with the appropriate N-P-K ratio for blackberries.
- Follow the application guidelines provided on the fertilizer package.
General Tips
- Regularly observe the health and growth of your blackberry plants, adjusting care as necessary.
- Keep the area around the plants free from weeds and debris to maintain good air circulation.
By following these care guidelines, your blackberry plants will thrive and provide you with a plentiful harvest of sweet and juicy berries.
Chapter 7: How To Prune Blackberries
What Is The Best Time To Prune A Cherry Tree?
Trimming cherry trees is vital for their wellbeing, form, and fruit yield. The perfect time to trim cherry trees is late winter or early spring when the tree is dormant. This time frame, usually from late February to early March, is when the tree is less prone to sickness, and not having leaves gives better sight of the tree’s design.
10 Easy Steps to Prune Cherry Trees
1. Gather Pruning Tools: Before you begin, ensure you have the necessary tools, including pruning shears, loppers, a pruning saw, and safety gear such as gloves and safety glasses.
2. Inspect the Tree: Examine the cherry tree to identify dead, diseased, or damaged branches. These should be your priority for removal.
3. Remove Dead or Diseased Branches: Using your pruning shears or saw, carefully cut back to the healthy wood just beyond the point of damage or disease. Make clean, angled cuts to prevent water from collecting on the wound.
4. Thin Out Crowded Branches: Cherry trees benefit from good air circulation and sunlight exposure. Identify branches that are crossing or overcrowding others, and selectively remove some of them to open up the canopy. Aim for a balanced, open structure.
5. Prune for Shape: Cherry trees can have different growth habits, depending on the variety. Prune to maintain the desired shape, whether it’s an open vase shape or a central leader system. Remove any branches that disrupt the chosen structure.
6. Remove Suckers and Water Sprouts: Look for any suckers (vigorous shoots emerging from the base of the tree) and water sprouts (vertical shoots growing within the canopy) and remove them promptly.
7. Leave Some Fruit Spurs: Cherry trees produce fruit on spurs, which are short, stubby branches. Be cautious not to remove all the spurs, as they are essential for future fruit production. Prune selectively to encourage fruit-bearing wood.
8. Seal Large Wounds: If you’ve pruned large branches, consider applying a wound sealant or pruning paint to protect the tree from pests and diseases. However, this step is optional, as some experts argue that sealing can hinder the tree’s natural healing process.
9. Clean Up: Gather and dispose of all pruned branches and debris to prevent the spread of diseases and pests.
10. Maintenance Pruning: Throughout the growing season, keep an eye on your cherry tree and perform light maintenance pruning as needed. This includes removing any additional dead or diseased branches that may appear.
Remember that proper pruning can vary depending on the specific type and age of your cherry tree, so it’s advisable to consult resources or seek guidance from local gardening experts if you have any uncertainties about pruning techniques for your particular tree.
Chapter 8: Common Disease Blackberries Trees
5 Common Blackberry Diseases (Identify & Treat)
Identifying and treating common blackberry diseases is essential for maintaining the health and productivity of your blackberry plants. Here are five common blackberry diseases and how to identify and treat them:
1. Orange Rust (Arthuriomyces peckianus)
- Identification: Look for orange pustules or blisters on the undersides of leaves. Affected leaves may become distorted, and the plant’s growth can be stunted.
- Treatment: Remove and destroy infected canes and leaves as soon as symptoms appear. Fungicide sprays may be necessary in severe cases. Plant resistant blackberry varieties.
2. Cane Blight (Coniothyrium fuckelii)
- Identification: Cane blight causes dark lesions on the canes, often with purple borders. These lesions can girdle the cane, leading to dieback and reduced fruiting.
- Treatment: Prune out and destroy infected canes during the dormant season. Improve air circulation by spacing plants properly.
3. Powdery Mildew (Podosphaera spp.)
- Identification: Powdery mildew appears as a white, powdery substance on the upper surfaces of leaves. It can lead to leaf distortion and reduced fruit quality.
- Treatment: Apply fungicides labeled for powdery mildew control as a preventive measure. Prune to improve air circulation, and avoid overhead watering.
4. Anthracnose (Elsinoë veneta)
- Identification: Anthracnose causes dark, sunken lesions on fruit, leaves, and canes. It can result in fruit rot and reduced yields.
- Treatment: Prune and destroy infected canes and leaves during the dormant season. Apply fungicides as a preventive measure. Avoid planting in areas with a history of anthracnose.
5. Botrytis Fruit Rot (Botrytis cinerea)
- Identification: Botrytis fruit rot affects ripe blackberries, causing gray mold on the fruit. Infected berries become soft and watery.
- Treatment: Harvest blackberries promptly when ripe to reduce the risk of infection. Ensure good air circulation and avoid overcrowding plants.
Stopping disease spread is important. Practice good garden cleaning by getting rid of infected plants, like canes, leaves, and fruits. Most importantly, destroy them. Also, think about planting blackberries that resist disease. Allocate appropriate space and allow enough air flow to lower disease chances. Regularly check your plants for disease signs. Act fast when you spot symptoms. Get advice about managing disease in your area, from local garden pros or extension services.
Chapter 9: Common Pests Blackberries Trees
5 Common Blackberry Pests (Identify & Treat)
Identifying and treating common blackberry pests is essential for protecting your blackberry plants and ensuring a healthy crop.
Here are five common blackberry pests, along with methods to identify and treat them:
1. Japanese Beetles (Popillia japonica)
- Identification: Japanese beetles are metallic green with coppery wings. They feed on blackberry leaves, causing skeletonized foliage.
- Treatment: Handpick beetles from plants in the early morning when they are less active. Use neem oil or insecticidal soap to control infestations.
2. Aphids (Aphidoidea spp.)
- Identification: Aphids are small, soft-bodied insects that can be green, black, or other colors. They cluster on new growth and the undersides of leaves, sucking plant sap.
- Treatment: Spray plants with a strong stream of water to dislodge aphids. Use insecticidal soap or neem oil for severe infestations.
3. Spider Mites (Tetranychus spp.)
- Identification: Spider mites are tiny arachnids that cause stippling on blackberry leaves. You may also notice fine webbing on the plant.
- Treatment: Hose down plants regularly to reduce mite populations. Apply neem oil or insecticidal soap to control severe infestations.
4. Raspberry Fruitworms (Byturus spp.)
- Identification: Raspberry fruitworm larvae are small, cream-colored caterpillars that feed inside ripening blackberries, causing damage and fruit decay.
- Treatment: Handpick affected berries and destroy them. Apply Bacillus thuringiensis (Bt) or spinosad-based insecticides during the larval stage.
5. Spotted Wing Drosophila (Drosophila suzukii)
- Identification: Spotted wing drosophila are small, fruit fly-like insects with distinctive spots on their wings. They lay eggs in ripe blackberries, causing fruit to become infested.
- Treatment: Harvest blackberries promptly when they ripen. Place harvested fruit in the refrigerator to kill any larvae. Use traps and insecticidal sprays as needed.
Monitor pests using Integrated Pest Management (IPM) techniques. This will help lower the risk of pest outbreaks. Always be vigilant with your blackberry plants. Look out for pests and address it immediately at the first sight of trouble. Behaviors like proper pruning and adequate plant spacing can keep the pests away. Reach out to local gardening gurus or extension services. They can provide helpful guidance on pest management unique to your region.
Chapter 10: How To Harvest & Store Blackberries
To ensure a bountiful blackberry harvest, employ proper harvesting techniques. Pick ripe berries, which are glossy, plump, and easily detachable from the stem. Use gentle fingers to avoid bruising and handle berries with care. Harvest regularly once berries are fully colored, promoting ongoing production throughout the growing season.
How to Know When Blackberries are Ready to Pick?
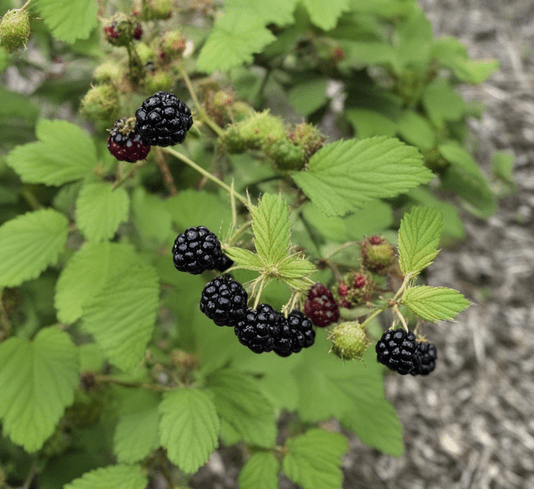
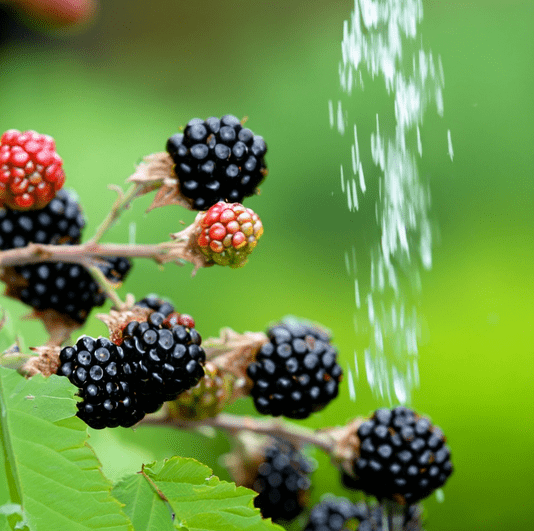
Color Change: The most obvious sign of ripeness in blackberries is a change in color. They should be uniformly dark and plump, typically a deep black or purplish-black, depending on the variety.
Firmness: Ripe blackberries should be firm yet tender. When gently squeezed, they should yield slightly without being mushy.
Ease of Separation: Like tomatoes, ripe blackberries should come off the plant easily when gently tugged. If they resist, they may need more time to ripen.
Size and Shape: Familiarize yourself with the expected size and shape of ripe blackberries for your specific variety.
Proper Harvesting Techniques for Blackberries
Gentle Handling: Handle blackberries with care to avoid bruising or crushing them. Damaged berries can deteriorate quickly.
Twist-and-Pull Method: Gently twist each ripe blackberry from the stem while pulling it to detach it from the plant. This minimizes damage to the plant and fruit.
Harvesting Tools: For stubborn stems or clusters, use garden scissors or pruners to snip the blackberries from the plant. Be careful not to damage the fruit or plant.
Inspect for Damage: Examine each blackberry as you pick. Discard any berries with signs of damage, mold, or overripeness.
Storing Blackberries
Ideal Storage Conditions: Store ripe blackberries in a single layer in a shallow container at room temperature, away from direct sunlight. Using shallow containers prevents berries at the bottom from getting crushed.
Refrigeration: If you need to prolong the freshness of blackberries, you can refrigerate them. However, refrigeration can affect their texture, so it’s best to consume them promptly.
Regular Inspection: Check stored blackberries regularly and remove any that show signs of spoilage, as one bad berry can affect the others.
Ethylene Gas: Blackberries, like some other fruits, produce ethylene gas, which can accelerate ripening. Keep them separate from ethylene-sensitive produce to avoid premature spoilage.
Ripening Process: If you have unripe blackberries, you can encourage ripening by storing them at room temperature, stem side down. Placing them in a paper bag with a ripe banana or apple can also speed up the process.
Avoid Moisture: Ensure that blackberries are dry when stored to prevent mold growth.
Freezing: For long-term storage, consider freezing blackberries. Freeze them in a single layer on a baking sheet, then transfer them to airtight containers or freezer bags to enjoy them later.
By following these guidelines, you can ensure that your harvested blackberries remain fresh and delicious for as long as possible.
As we wrap up our guide on how to plant blackberries, you’re now equipped with the knowledge to turn your berry dreams into a bountiful reality. From selecting the perfect variety to nurturing your plants through growth and harvest, we’ve covered every step with precision. Your backyard is on the verge of becoming a thriving blackberry haven, and the sweet taste of homegrown success is just around the corner. So, roll up your sleeves, grab your gardening tools, and embark on this delicious journey – your flourishing blackberry garden awaits!